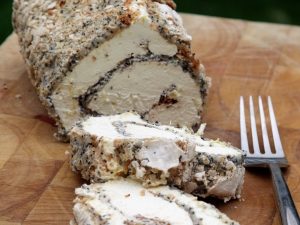
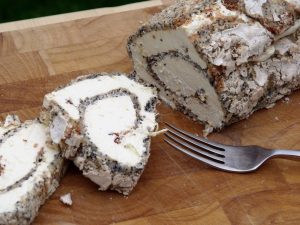
Gin Cookie Cupcakes?

My simple, easy and totally delicious Gin Cookie Cupcakes are such a treat you might not want to share them with anyone.

Gin Cookie Cupcakes are light, crumbly yet moist cookie cases filled with delicious sweet & sour cherries and white chocolate. You can eat them cold or hot, almost naked with just a sprinkle of icing sugar. Or you can go full on and top it off with a swirl of white chocolate and violet ganache decorated in edible flowers.

A little secret…

I’m going to tell you a little secret about me. In my previous life I’m a trained mixologist. At Christmas I put this talent to good use and one of my favourite cocktails is an Aviation.

For those of you who have never head of Aviation cocktail let me explain and you can see how this beauty of a drink inspired me.

The Aviation cocktail is a classic made with gin, maraschino liqueur, crème de violette, and lemon juice. All sounded like an a perfect match made in heaven. To make it more decadent I am adding white chocolate.


Gin Cookie Cupcakes are very easy and reasonably quick. Best way is to watch my Deadpool Christmas Special and you will see for yourself how simple Gin Cookie Cupcakes are.I am sure as soon you try it once you will love it for life!

What Gin Cookie Cupcakes taste like?

Delicate bitterness of gin, sweetness of the cherries and white chocolate and subtle freshness of lemon zest. Already a winner! Now to put it into the practice!

Today in my recipe I will be adding my favourite Aviation Gin (pun not intended it really is my favourite). However if you are feeling generous and decide to share these definitely adult only treat with the kids you can leave the gin out and add a splash of vanilla!


Method.

Turn on the oven to …. and set aside clean and dry cupcake tin

Put in your mixer bowl

  • 200g sugar
  • 225g butter, soft, room temperature

Cream the above together in the mixer until light and fluffy.

Add

  • 2 eggs

and continue until mixed well.

In the meantime prepare

  • 120g grounded almonds
  • 320g plain flour
  • Couple of shots of your favorite gin
  • 3/4 tsp lemon zest

Add it all to the mixing bowl and incorporate well. Tip it onto a baking paper and roll a long about 2″ thick sausage. Put the Gin Cookie Cupcakes dough in the fridge. Rest it for a while (you can leave it for an hour or two or even overnight) until nice and firm and easier to cut.

The white chocolate and cherry filling.

When dough is resting prepare:

  • white chocolate buttons and
  • a can of sour cherries in compote

To make perfect caramelised cherries for the filling is easy. Put the cherries in to a pan and bring them to boil. Cook it slowly on low heat until the compote is reduced and the cherries are sticky and shiny.

You can watch my recipe movie ‘Baking with Aggy’ – ‘Deadpool Christmas Special’ for the step by step instructions.

Preheat your oven to 175C fan.

When you dough is set slice it to 12 discs of 3/4″ (just under 2cm) thick and 12 1/2” (around 1cm) discs and fill all the 12 cupcake wells in your cupcake pan with the thicker pieces. You don’t need to grease it or use any cases as the dough is already full of butter and will pop out easily.

Press is gently making sure the dough is well distributed and make small indentations for the filling.

Put some cherries in each one and top it with some chocolate buttons. Then take the thinner slices and press firmly around to seal the Gin cookie Cupcakes so the filling doesn’t run out.

If the dough is still cool to touch you can bake it straight away otherwise put in the fridge for 10-15 min.

When ready put it in the oven and bake Gin Cookie Cupcakes for 15-17 minutes or until golden.

If you can’t wait to try (I can imagine how your kitchen smells like now) just sprinkle with icing sugar but if you want to save them for later top it off with some white chocolate ganache!

Voila!

Bon Appetite!


I know you will enjoy Gin Cookie Cupcakes as much as I do!

Happy baking and until next time!!

Love,

Aggy xxx

‘Deadpool Christmas Special’ and ‘Baking with Aggy’.


Well, when thinking about new projects it can be hard and daunting to get the idea processing in my head. On this occasion however I’m still not sure how I came up with Deadpool Christmas special. Could of been one to many aviation cocktails but it just seamed perfect.

Deadpool Christmas Special

Deadpool, everyone’s favourite anti hero, a bad guy who gets rid of the worse guys. Immortal mutant who fought this heartless disease that in current day affects so many of us!

What a perfect person to invite round to do some baking with. It sounded ideal. 

So, I have picked up the phone & made some calls and Deadpool was in.

Real life Heroes!

But we don’t need to watch a movie to see a hero. In Deadpool words ‘I might be super but I’m not a hero yet’ and I decided to dedicate this short story to real life heroes!!


We have heroes around us everywhere.

One of them is my friend Ryan. 

He is one of the bravest, positive people I have ever meet. Why is he a hero you would ask? Well, he is a fireman and he protects and saves others life’s. In my eyes whatever the definition of a hero might be he is definitely one of them.

Other hero is Ryan’s wife Lucy who has been diagnosed with stage 4 cancer. 

Lucy is a fighter and with the support of her friends and family she is tackling this awful disease head on! However Lucy need to take regular trips to St Richards Hospice in Worcester where she is receiving treatment and help. 

So me and Deadpool came out with a little plan. Deadpool Christmas Special was a perfect excuse to have a little play.

St Richards Hospice Worcester.

St Richards Hospice is where you can find the real super hero’s.

This place is run by staff with the fantastic and generous support of many volunteers. Selfless souls who help those who have life-limiting illnesses and to thank and help them run the place I have decide to raffle off a Unicorn cake and all the proceeds to donate to the Hospice.

Shootings Star Chase Hospice.

By downloading Avid Merrion’s Proper Crimbo song for 99p that plays near the end of movie you also support Shooting Star Chase Hospice.

Thank you everyone!

Win a Unicorn cake!

The idea is simple. Each donation of a £5 will get you one raffle ticket and you can get as many tickets as you like. 

{HERE you can donate in exchange for your raffle TICKET(S)}

Unicorn cake, Edible By Aggy

The money is donated straight to St Richards Hospice. All you need to do after donating is email us on deadpool@ediblebyaggy.co.uk with your name, address or just a postcode so we know the area where to deliver the cake. Please don’t forget to add the ideal date you would like me to deliver the cake to you! 

You can pick any date in 2019 and within a reason if I have the space I will make the cake for that date. Otherwise we will agree another suitable day. This raffle is for a Unicorn cake but I’m happy to make a Pegasus (unicorn with wings) similar to the photo below.

The raffle will close on the 6th of January 2019. There is no cash price or money exchange in any circumstances. 

Details of the cake to be agreed between winner and myself.

Cookie cupcakes recipe that we make in Deadpool Christmas special.

If you fancy trying Gin Cookie Cupcakes we are making with DP  in our Christmas special you can find the recipe and how to prepare it HERE!

So while I am having fun baking with Deadpool don’t forget to check our short movie HERE if you haven’t seen it yet and buy some tickets!!!

And lastly I would like to wish you all a very Merry Christmas and a Happy New Year!

Be good, remember Santa is always watching. 


Happy baking,

Aggy x

Easy Coffee meringues recipe Edible By Aggy

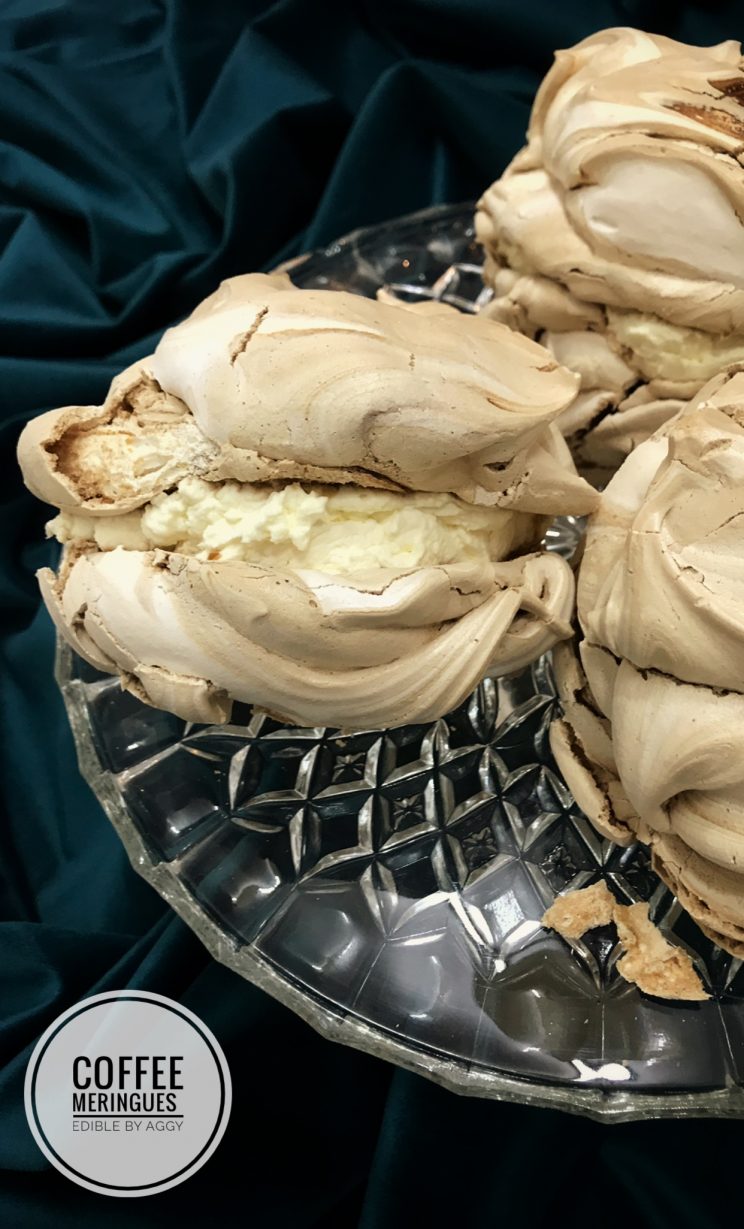
This week is National Coffee Week so whats better to celebrate it with than a Coffee meringues.

Fresh, moist, crunchy and chewy and full of whipped cream.

Coffee meringues recipe

Coffee Meringues, a trip down memory lane

My childhood memories give me a lot of inspiration for my cooking and baking today. Watching Celebrity Bake Off a few weeks ago reminded me about one of my favourite Coffee Meringues. A special simple desert from the best bakery in town where I was born.

Every time I went there the choice was pretty difficult. No only the well known classics to choose from but now and again a special new treat was popping in. In almost all cases my first choice were Coffee Meringues. 

Pretty. Flawless. Always fresh and full of whipped cream.

Easy Coffee meringues recipe Edible By Aggy

We were allowed to eat Coffee Meringues because it was made with Inka. We have this special wheat coffee in Poland. It is extremely tasty and contains absolutely no caffeine.  When I was younger Inka was served with breakfast or with supper. It was very popular and probably even more consumed than hot chocolate at that time. Usually made with only milk or half and half with water.

Therefore it was totally safe for us or any kids to have Coffee Meringues. 

Today I am recreating my childhood taste with some Inka that I have left over from my latest trip to Poland. When making Coffee Meringues you can use ordinary instant coffee or any other alternative as it only contains tiny amount.

Tasty clouds of happiness.

Coffee Meringues are very easy to make. They don’t require any special skills or equipment. You can eat them straight away or leave to soften for a few days.

Giant, delicate, light, crunchy and gooey Coffee Meringues  are sandwiched with delicious whipped cream. When fresh the crunchy shell brakes as you bite it and it’s soft centre amazingly complimented by the cream.

Easy Coffee meringues recipe Edible By Aggy

Method.

Turn the oven to 145C.

To make 8 giant halves you will need:

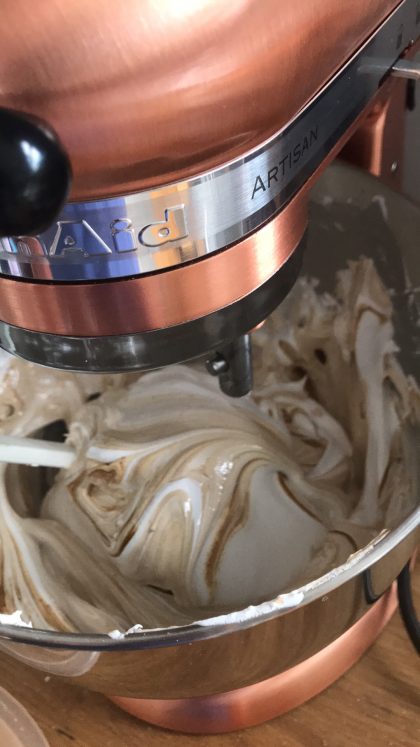
Start by whisking on fast speed for a few minutes until the mixture become stiff.

While the mixer is still on add slowly to the mixture, spoon after spoon:

  • 300g sugar

Prepare coffee.

  • 3 tbsp instant coffee
  • 2 tsp spoons of boiling water

Gently stir in the coffee into the mix.

Easy Coffee meringues recipe Edible By Aggy Dadan

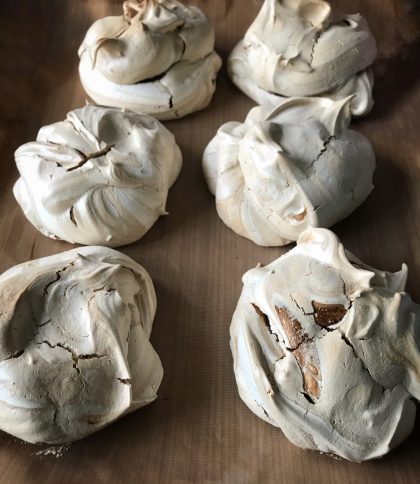
Spoon it on to a baking sheet. The recipe makes 8 large Coffee meringues. That’s about 2 spoons of mixture each.

Bake at 145C preheated oven for approximately 1 hour.

In  the meantime you can whip

  • small pot of double cream
  • 1 – 2 tbs icing sugar

Keep it in the refrigerator until the Coffee meringues are ready.

Sandwich Coffee meringues with the cream as soon they are fully cooled. Eat straight away or keep it for later.


I am sure you will love these!!

Happy baking.

Aggy x

Crunchy and simple biscuits that look like beautiful pastry Princess plaits.

Princess Plaits biscuits

What are Princess plaits and where did they come from?

Originally this was my grans recipe and she called it Kindling. I guess because Kindling, now Princess plaits were crisp, snappy and very light. They were eaten at the end of carnival season just before lent and Ash Wednesday.

The Polish tradition of Kindling slightly faded in our house. Mainly because we do a lot of baking so keeping up with additional sweets proves too many cakes. Also because Zara loves helping so we make these as an afternoon treat, when she wants to make something different.

Why should you make it?

Princess plaits are the tastiest way of using left over egg yolks after making Coffee meringues (recipe coming up soon) which you also must try!!

Besides Princess plaits are perfect for kids motor skills and believe me the small hands become faster with each plait! Check the video below. Zara is a master at it now.

I’ve slightly improved and speed up the way of doing Princess plaits in my recipe. It use to take so much longer hence Princess plaits have been made only at special occasions. Making this now quite efficient, pain free and speedy process so Princess plaits were just perfect name for it.

Unlike any other biscuit.

The biscuits are quite light and soft but you need to try it yourself to understand the texture. It’s this kind of consistency between crunch and crumble that I cant really find a word to describe.

Freshly cooked they are delicate, puffy and delicious. Left aside to cool they become crunchy and snappy unlike any other pastry I have ever tried.

Princess plaits biscuits when fresh are perfect on its own or lightly sugar dusted.  They can be sprinkled with cinnamon sugar or dipped in a chocolate sauce.

Princess plaits


Method.

Put all the ingredients in a mixer bowl:

  • 450g plain flour, sieved
  • 5 large, organic egg yolks
  • 1 or 2 spoons of your strongest alcohol (rum, brandy or vodka type)
  • 200g natural yogurt

You can try making Princess plaits by hand but much quicker and easier will be using a mixer as it requires good beating. Mix using the beater end, the idea behind it is to incorporate as many air pockets as possible.

Start mixing it on a slow speed slowly increasing. Eventually turn it on on maximum and watch the mixer as it might turn a little bit violent. Continue mixing the dough on high speed for at least 15 minutes.

Place aside to relax wrapped in cling film or a sandwich bag for at least half an hour.

Put the Princess plaits dough back in the mixer and continue to beat it on high speed for additional 15 minutes. Wrap again and put in the fridge for another half an hour.

Fun part!

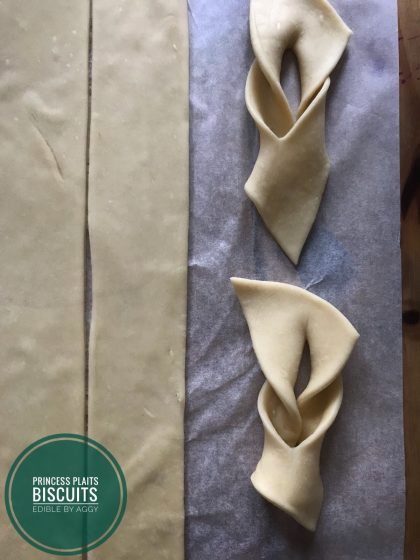
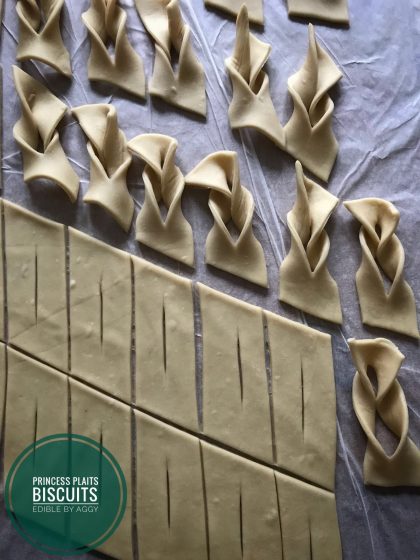
When ready, roll very thinly approximately 1.5 to 2 mm. Use pizza cutter to cut 1.5″ wide strips then make diagonal cuts about 3″ apart to create the individual pieces. Then cut each piece carefully through the middle leaving about 3/4″ uncut space at each end.


Gently twist one end through the middle cut to create Princess plaits look alike. Once again please check my video above when Zara is making it very easy.

Warm up in a pan

  • 2 cups of oil suitable for frying (rapeseed or coconut are best)

and fry on medium heat for a few minutes each side until golden. At this stage please keep little people away from the pan. It can get very hot and it might make the process difficult. They cook very quickly and no one would enjoy a burn Princess plaits biscuit.

You can eat it immediately or save (if there are any left) for later.

Princess plaits when still warm go best with a little sprinkle of icing sugar but you can enjoy it with anything you like.


I hope you will like Princess Plaits biscuits as much as we do!


Enjoy!

Until next time. Happy baking.

Aggy x

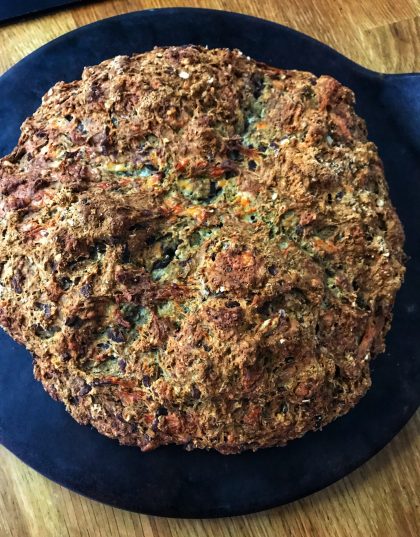
Yesterday we had our friend Nick over for lunch. As it was a last minute kind of thing, I quickly made some Cheese onion chutney soda bread to have with our lunch!

Cheese onion chutney soda bread

Cheese onion chutney soda bread

I haven’t made my Cheese onion chutney soda bread recipe for a little while. Mainly because I ran out of my organic home made onion chutney (its been so long, we nearly forgot how to make it!) , and secondly, I had almost forgotten how delicious it is. This time, I had to resort to a shop bought jar which comes in at a close second to my home made version – organic red onion chutney. We actually liked it so much, I have made another one today!

When I was little, I used to go through colds and flu more frequently than other kids. I always preferred home remedies, and often I was served onion syrup. One day, having bad cough as an adult and not able to shift it, I decided to try onion treatment from my childhood.

How Cheese onion chutney soda bread was made.

I had a lot of sugary onion left after a recipe I was using one day. As I don’t like wasting food, I thought I’d try making onion chutney. If it went wrong, it wouldn’t be a massive waste, as I had already extracted and used the syrup.

Playing around with the remaining onion, adding various seasoning and vinegar, I came up with a pretty tasty onion chutney (recipe to follow). I wasn’t sure why I hadn’t ever tried onion chutney in my baking – it was so tasty! At the time, we were making a lot of courgette soda bread. It is my favourite savoury bake, especially when these amazing vegetables are in season.

Soda bread, what is that?

I remember the day I tasted soda bread for the first time…

Years ago, when I first arrived in England, I was working in a pub, owned by an Irish chef, as a barmaid. New to the pub (and the country), the chef fed me all sorts of new stuff every day. One reason was to become familiar with the menu, and in case any of the customers asked. Another reason was to prove to me how good his cooking was! I was allowed to pick anything from the menu, and that day I had spotted a new dish, accompanied by soda bread! Being very curious what this type of bread was, I decided to try it immediately.

To my pleasant surprise, I fell in love with this new thing straight away and have never looked back. Now I make all sorts of flavours pretty often, besides it is a great side dish for any meal.

Cheese onion chutney soda bread is so simple to make that quite often Zara can make it herself. She still requires a bit of supervision when she is preparing the ingredients. However, even the least experienced baker will be able to make this, if you follow the instructions carefully. It literally takes five minutes to weigh, mix and put it in the oven.

Absolutely divine.

Cheese onion chutney soda bread tastes divine. If you never had this type of bread the texture will be hard to describe. So, I would wholeheartedly recommend you to make it and try it for yourself. Cheese onion chutney soda bread is a little sweet and savoury at the same time. Is moist inside and crunchy outside, and my favourite way to eat it is just plain covered in salty butter. Oh my I love my butter! Still solid, straight from the fridge so you can slice it like a cheese whilst the Cheese onion chutney soda bread is still hot!

Method.

Turn on the oven to 200C, 180C fan.

You can prepare the whole Cheese onion chutney soda bread recipe in one bowl –  minimising the cleaning afterwards!

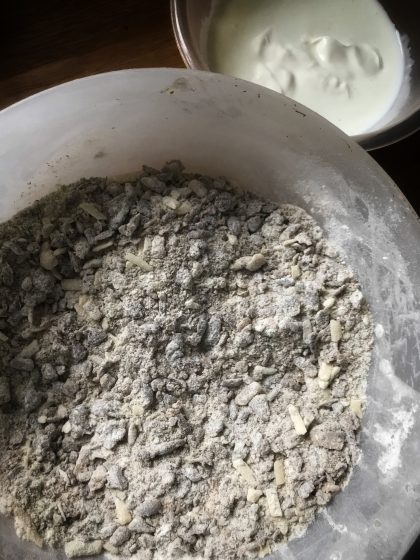
Prepare in a bowl:

  • 400g sieved self rising flour
  • 50 – 80g of chunky oats
  • 2 tsp. of bicarbonate soda
  • 3 – 4 tbsp of red onion chutney
  • 150g of grated cheddar or gruyere (or any other strong, hard cheese)
  • 4 rounded tsp of dry dill

Mix well with a wooden spoon (or with your hands). Personally, I prefer to use a spoon when I am making it myself, it’s quicker and less messy. However, when Zara is helping, she likes to use her hands.

Cheese onion chutney soda bread

Add:

  • 200g kefir or buttermilk
  • 100g natural Greek yoghurt

Stir well but not too long. Only a few minutes maximum, or will become stodgy!

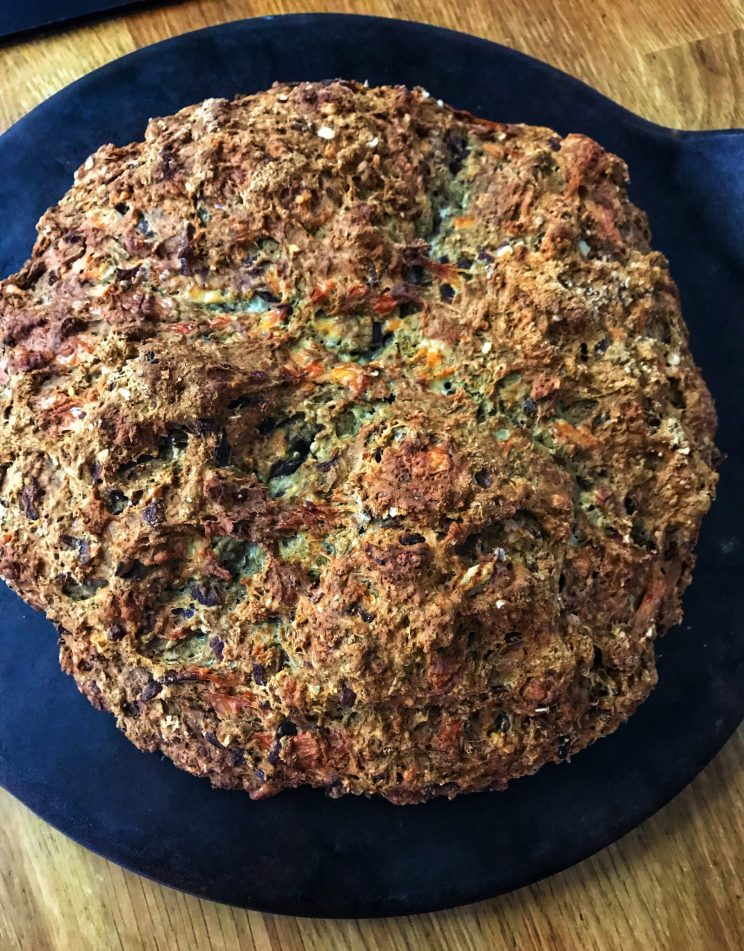
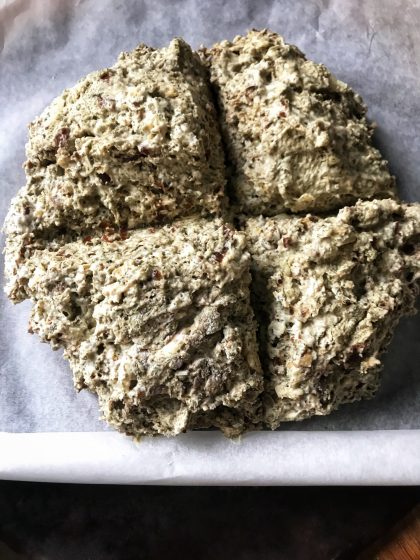
To bake Cheese onion chutney soda bread, I use my pizza stone. Firstly covered in baking parchment to avoid the dough from sticking.

Make a ball out of the dough, place on the stone (if you haven’t got stone, an ordinary baking tin will work too) and cut a deep cross on the top. Open it gently and allow to spread so it can rise evenly.

Cheese onion chutney soda bread

Bake for around 40 minutes on the parchment, and for further 20 minutes without to crisp up the bottom of your Cheese onion chutney soda bread.

Remove from the oven and leave on a cooling rack.

Voilà!

Bon appétit. I hope you will enjoy it as much as I do!

Aggy x


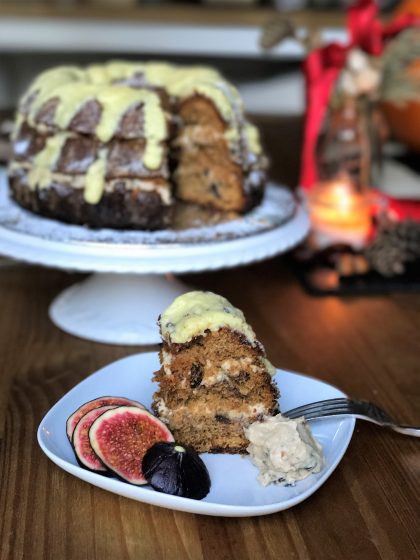
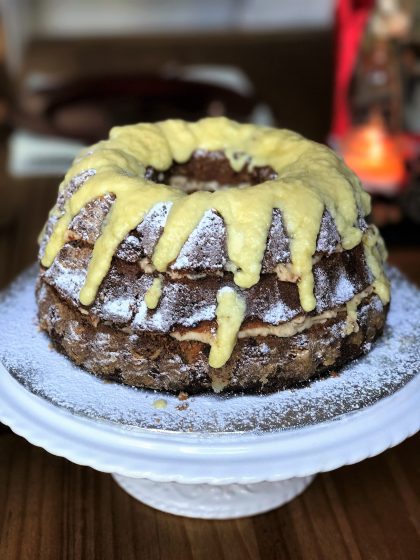
Woke up this morning to an amazing white scene outside and started craving a slice of Christmas mincemeat sponge.

Christmas mincemeat sponge

I love snow, probably as much as I love cake. Especially because it reminds me of cold, snowy, Christmassy mornings when I was a kid. Every time when we had fresh snow, and usually in Poland snow was quite deep, we would go sledging. I was one of those lucky kids living next to a hill. In summer we called it Green Hill but obviously in winter it metamorphose into the best sledging course. Thinking about it now it was actually quite scary and super fast course about 150 metres long. Playing with all the kids racing we would spend there almost a whole day coming back knackered and hungry.

As soon we came home we either would have dinner or in most cases hot chocolate and slice of cake!

And because is almost Chrimas this was a perfect excuse to bake Christmas mincemeat sponge.

Christmas mincemeat sponge


Some might ask what mincemeat is?

I have never heard of mincemeat before coming to England. Apart from that one time when Rachel from Friends wanted to make British Christmas trifle-pie. Everyone remember this episode, right?

In the UK everyone knows what mincemeat is and all the stores sells at least a few different types. Mincemeat despite the name is a sweet mix of dried fruit soaked in alcohol. Mainly used in Christmas bakes like Mince pies but this time I have used it in Christmas mincemeat sponge recipe.


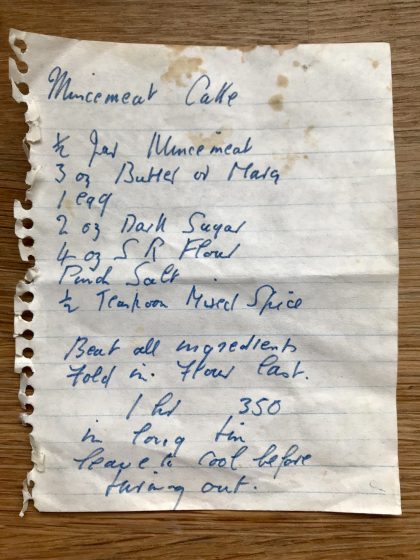
This particular recipe is probably more than 30 years old and belonged to Zara’s great grandma… or possibly ever her great great grandma. I found it in her little recipe box and one day decided to give it a go.

We love great grandmas Christmas mincemeat sponge so much we make it during the year as well as for Christmas.


Christmas mincemeat sponge is a quick, easy and very tasty treat even for those who have a limited baking repertoire.

What does it taste like?

The Christmas mincemeat sponge is not too sweet, bit tangy with characteristic mincemeat flavour. Light and delicious. With little bursts of juicy fruit surrounded by rich and moist sponge. So unlike the traditional Christmas cake which can be quite heave and stogy with strong aftertaste.


You can eat it plain…

Christmas mincemeat sponge

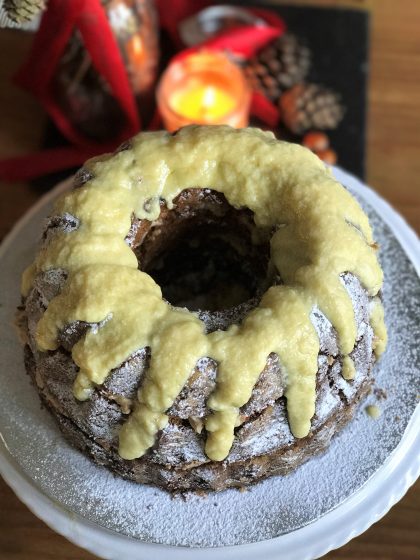
…or filled with Mincemeat cream cheese frosting (recipe to follow) and drizzled with white chocolate sauce to make it more festive.


Method.

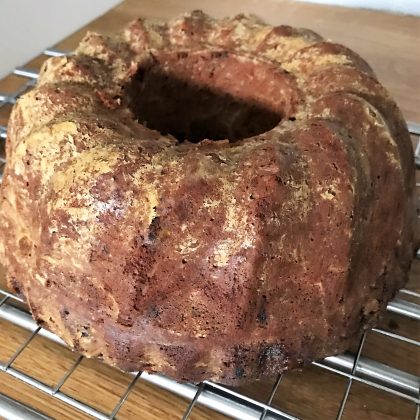
You will need greased and flour small round cake tin 7 – 8″ or a pretty bundt tin. Set your oven to 175C, fan 160C.

Place in a mixer bowl:Christmas mincemeat sponge

  • 170g of butter or vegetable oil spread
  • 2 eggs
  • 110g soft dark sugar

Beat until well combined.

Add:

  • 1 jar of mince meat (around 400-450g)

Mix on slow to medium speed for couple of minutes but be careful not to overmix. Sieve and carefully fold in:

  • 225g self raising flour
  • pinch of salt
  • 1/2 tsp mixed spice
  • 1/2 tsp cinnamon

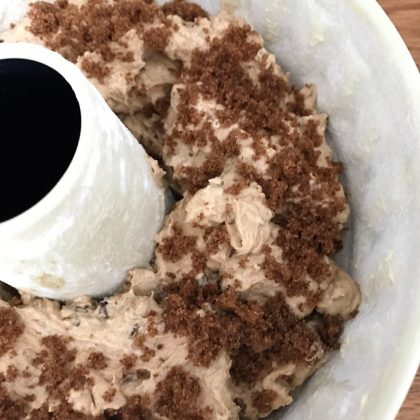
Scoop the mixture into the tin and sprinkle with some extra soft brown sugar if you wish for a nice crusty finish.


Place in the oven and bake until brown, approximately 50 minutes to 1 hour.

When ready remove from the tin. You can eat it warm.

If you decide to layer your Christmas mincemeat sponge with cream first let it completely cool down.

Enjoy with freshly sliced fruit as a dessert or Christmas afternoon cup of tea.

Bon appetite,

Aggy x

Simple Cinnamon sugar.

One of my favourite spices is Cinnamon. Cinnamon is very versatile and I have used it many time in sweet and savoury dishes. Today is a quick note on how to make Cinnamon sugar. 

I always keep a box of Cinnamon sugar in the cupboard as it can be used with almost anything. From cheeky coffee in the morning, home made custard or use it in a (Aggy’s) cake recipe.

Cinnamon is a spice which is ground from the inner barks of trees in the Cinnamomum genus. It comes in two forms, as a powder and rolled chunks of bark. It has a characteristic aromatic sweet flavour. Uniquely spicy in a woody type of way, with a strong, warm, pleasant aftertaste slightly similar to ginger.

How to make good Cinnamon sugar?

To make my Cinnamon sugar I use very fine sugar but you can use a coarser type.

The amounts are approximate and you can adjust to your personal taste.

You will need:

  • 200g fine sugar, preferably caster
  • 4 – 6 hipped tea spoons of powder cinnamon

Simply mix together. Store in a air tight box or a container. Use within a few months.


Perfect for rolling the Chimney cakes in.

Pearfect turnover, lazy pear and cream cheese puff pastry wrap.

We have all been in the situation where you need to bake something quick and have no idea what to make. We were sat on the sofa having a rare lazy day when we had that freshly baked craving, but didn’t want anything to time consuming. Having this feeling I have thought of a solution the Pearfect turnover.

Looking through the kitchen I found ready made puff pastry and bag of pears so quickly created this tasty bake.

Pearfect turnover

Pearfect turnover is ideal, whether it is…

… for a last minute dinner party and you need a quick desert.

… friends or family are coming over and you need something for afternoon tea.

… or it’s one of those lazy Sundays when it’s raining and nothing you can find tempts you. Only something freshly baked and hot from the oven will do.

So that’s how the Pearfect turnover was born.


Pearfect turnover that I came up with is the simplest, tastiest sweet treat ideal for any occasion. When you bite into the Pearfect turnover immediately can taste the juicy pear with flaky puff pastry covered in cream cheese. It isn’t overly sweeet but natural and fresh pear flavour makes it perfectly balanced. The pear will become soft and juicy which will complement the crunch of the puff pastry.

Minimum effort, maximum taste.

This Pearfect turnover really is the minimum amount of effort with maximum taste. I think baking can be cheating sometimes. It doesn’t have to be hours of preparation or following complicated recipes. If that isn’t you try this simple recipe and you can see how much fun baking could be.

This is exactly what we made a beautiful juicy pear wrapped in puff pastry straight from the oven. Enjoyed with some fresh double cream, this really is as simple as baking can get.

Pearfect turnover. A pear and cheese puff pastry wrap, easy and quick to bake.


Method

1 pack of ready rolled puff pastry

3 Pears

200g of soft cheese like Mascarpone or similar

3 tbsp. of dark soft brown sugar

some spare large grain sugar for the top, I have used Demerara


Pre heat the oven to temperature marked on your pack of pastry.*

Put the soft cheese in a bowl, beat until smooth. Add in the soft brown sugar to taste and mix until combined.

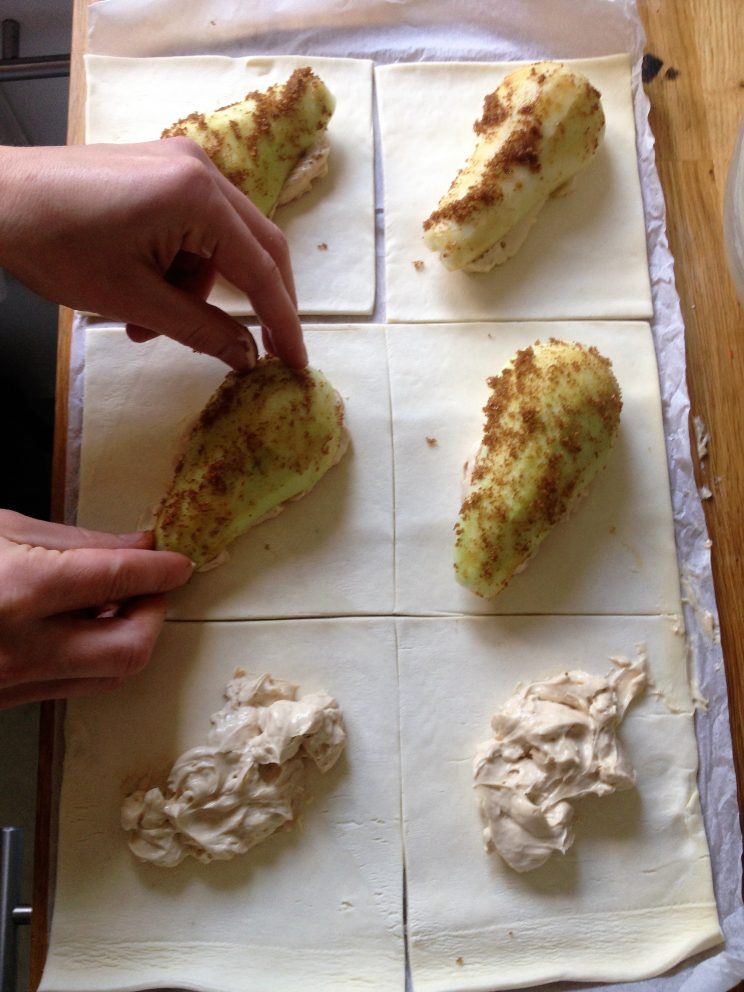
Peel the pears and cut into half’s, remove the seeds. Unwrap and unroll the readymade pastry and cut into 6 equal squares.

Divide the cream cheese and put into the middle of each square of the pastry. Gently press the pear half diagonally on the pastry, sprinkle with brown sugar.

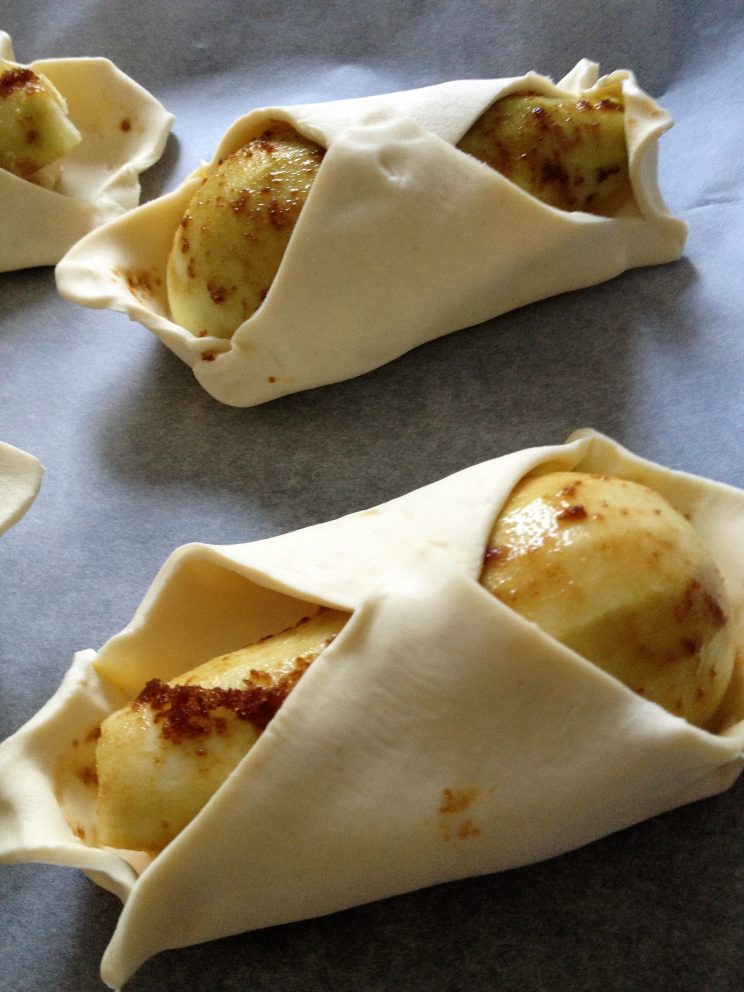
Fold up the corners and pinch at each end to make a boat shape. Fold the corners across the pear, gently press to stick together like so:

Place in the oven and bake as directed on the pack or until golden brown.*

When baked remove and place on a cooling rack You can eat it hot straight from the oven with some fresh cream or leave to cool and enjoy later. They keep very well and you can even freeze them for another day (if there is any leftover).

The sweetness from the cream cheese and baked pear go perfectly and the flakey puff pastry really makes this a tasty treat for any occasion.

If you have no pears you can swap them for apples, peaches, plums or any other ‘firm’ fruit.


Keep an eye out for more quick and tasty treats to enjoy.


*I haven’t been specific with temperature and baking time as the pastry will vary slightly from brand to brand.

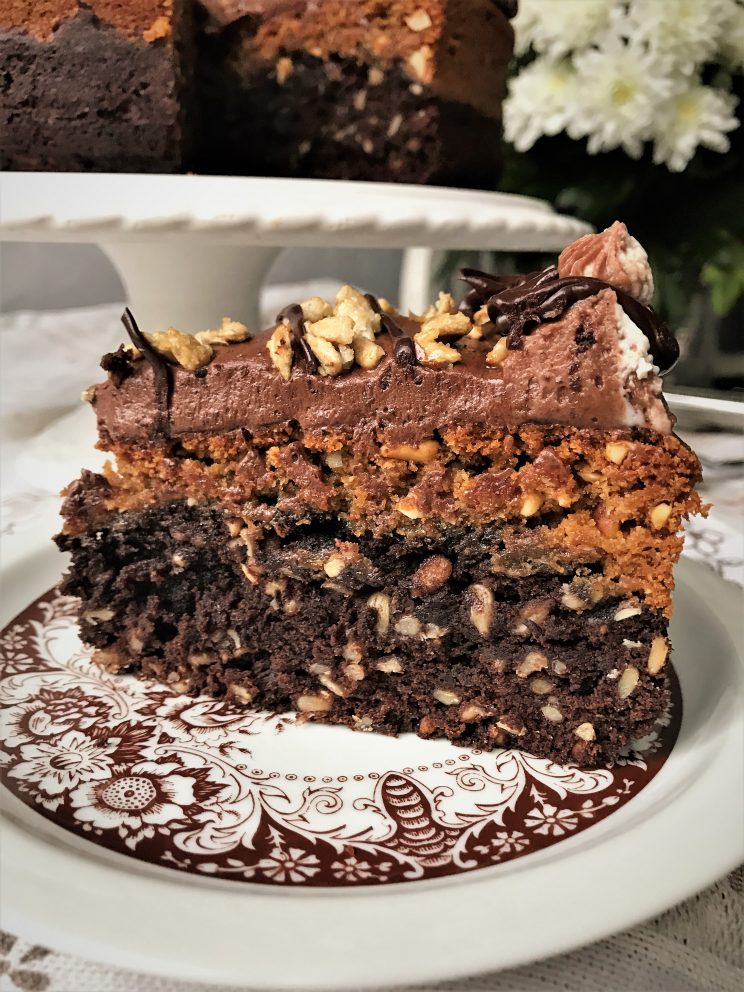
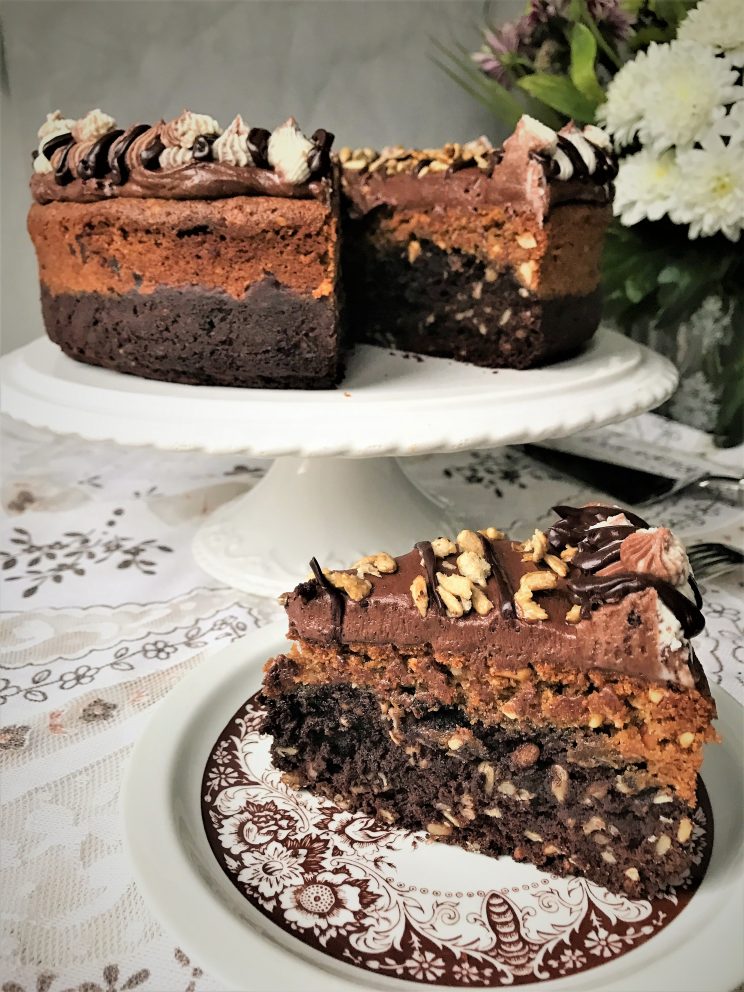
Nutty Sunshine Torte

Nutty Sunshine Torte

I am quite fussy when it comes to food and I don’t like walnuts in brownies but fancied creating the texture they give. One day I really wanted a sweet, nutty treat and I have decided to replace the walnuts with sunflower seeds.

When sitting and testing for the first time I had another genius moment and just spotted peanut and almond brownie laying around. Put the two together with a little bit of cream and that is how Nutty sunshine torte was made.

Nutty Sunshine Torte

Nutty sunshine torte is very easy bake and you can make it in only one bowl with a couple of utensils.

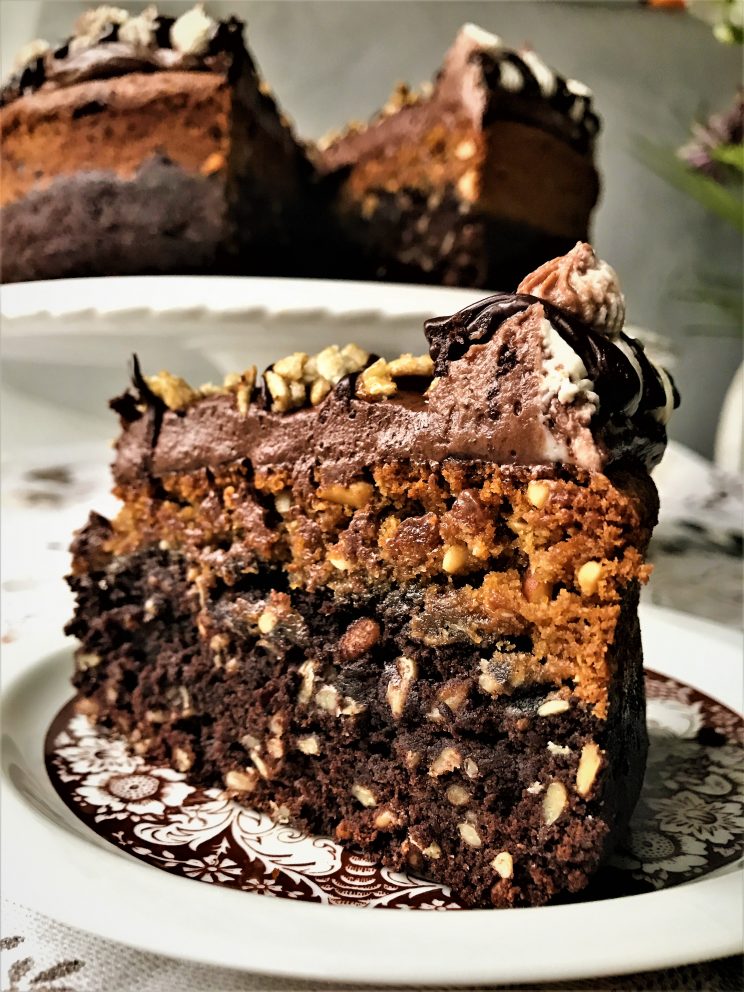
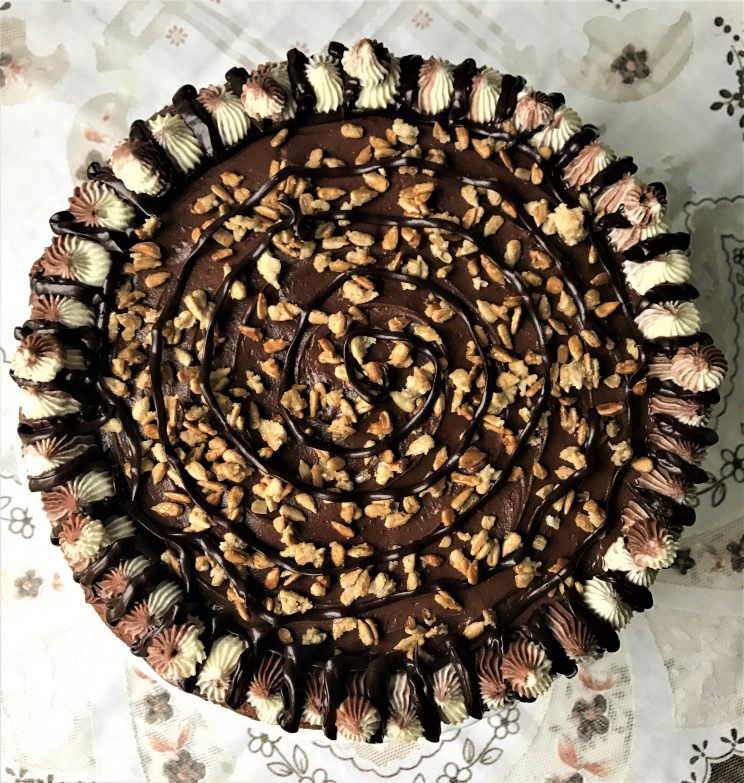
It taste a little bit like cake version of Snickers bar. Chocolatey yet crunchy, full of chewy peanuts, slightly salty, topped with delicious fluffy cream.

Nutty sunshine torte a perfect afternoon tea treat or birthday cake all depending on your creativity and imagination when decorating.

Nutty sunshine torte is an easy, simple perfect brownie Snickers cake.

Nutty Sunshine Torte

The recipe

For the first layer you will need:

  • 210g white sugar
  • 160g soft brown sugar
  • 85g cocoa powder
  • 150g plain flower
  • 1/2 tsp baking powder
  • 1/4 tsp rock salt
  • 180g sunflower seeds
  • 4 organic eggs*
  • 225g melted unsalted butter
  • dash vanilla

*TOP TIP. If you are baking with your kids let them crack the eggs. The easiest way is to open them over a sieve in case any shells breaking in. Then simply whisk it through.

Heat the oven to 175C or 155C fan.

Sieve all the dry ingredients in to a large bowl. Add the rest and mix it with a whisk or a wooden spoon until well combined.

Line 9″ spring form with baking paper and put the mixture in the tin.

Place it in the oven and bake the first layer for 30 minutes. In the meantime prepare the peanut layer.

For peanut layer

use the same bowl and utensils and mix through after adding each ingredient:

  • 120g crunchy peanut butter
  • 40g of peeled and roughly chopped monkey nuts
  • 70g melted unsalted butter
  • 130g white sugar
  • 100g soft brown sugar
  • 2 organic eggs
  • dash of vanilla
  • 110g ground almonds
  • 1 tsp baking powder
  • 1/4 tsp of rock salt

After baking the first layer for 30 min take it out the oven carefully. Try to complete the next step quickly.

Very gently top the the peanut butter mix on to brownie layer. Bake for additional 30-40 minutes at the same temperature until golden brown. Leave to cool.

The cream

  • 90g unsalted butter
  • 45g cocoa powder
  • 2 tbsp golden syrup
  • dash vanilla
  • 250g icing sugar
  • 2 to 4 tbsp milk

Put all in a mixer and slowly work to a paste then beat on high speed for a few minutes to light and fluffy.

Spread on the cake and decorate as you wish.

Nutty Sunshine Torte

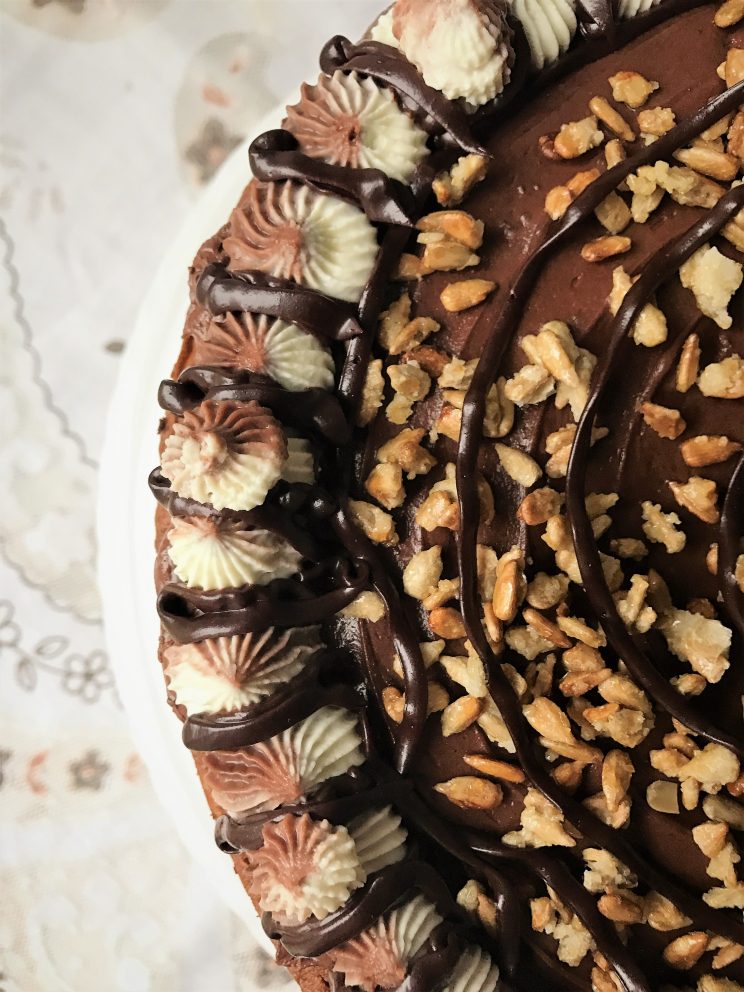
I decorated mine with some toasted in sugar sunflower seeds, mascarpone and some dark chocolate sauce.

Nutty Sunshine Torte

Nutty Sunshine Torte

Enjoy!

Aggy x

80’s TV 7th birthday cake for Celebrity Juice Keith Lemon ITV2 Part 2

Arriving at the Celebrity Juice studio.

When set off for London all we had in our minds was “please don’t slide in the boot”! Every bump and noise from the car had us worried as we drove on. It was a two hours’, shaky drive to get to the Celebrity Juice studio. It made it even more difficult for Aggy and Beccy holding the caricatures, while Andy did his best to miss the pot holes.

When pulled up to the studio it dawned on us that we still need to get this cake out again. After some frantic running around we managed to find the correct studio and went to find help. Six ‘Celebrity Juice’ team members come out rather nervous, as they had no idea what is was going to look like. As I opened the back of the van we all breathed a huge sigh of relief.

It still was all in one piece!

As we all crowed around it to lift it out more and more people came to have a look. This only added to the pressure but with a gentle push and a wiggle 250kg of cake was on the trolley and ready to finish in the studio. As we made the long (about 25m, but felt like 4 miles) journey to the studio we could hear Keith’s voice from inside. We had two reroutes on the way because of cables and other obstacles. The cake sliding nearly dropping off the trolley at one point but we had it back stage and could start the final assembly.

Last finishing touches to the Celebrity Juice cake.

photo-23-09-2015-06-01-20-pmWhile we were working like mad to finish it, we could see Keith Lemon setting up the show and we were constantly laughing. While putting the ribbons on and painting the inside of Fearne’s nostrils we noticed Keith was stood next to us open mouthed. A bit shocked we shook hands and starting chatting cake. He loved the heads and asked if he could keep his after filming. Who are we to say ‘NO’ to Keith Lemon!!!! As we are chatting away with him we had to demonstrate where to start cutting. The way it was made you could cut straight from the top of the TV to the bottom of the screen.

The only thing nobody had a knife!

After a good long chat he had to run off to get ready for filming and with the cake nearly done we started breathing again.

Just before filming last little push around the studio to move the cake across to the other side of the stage. As we pushed it across we got nice OOOOO’s and AHHHHH’s from the audience.

A last lift to the stage!

We finally sat down!

The filming began.

The next four hours were a blur of constant laughter, watching the filming and how the show is made. How Keith Lemon has so much energy is a mystery he is always doing something hilarious.


After the filming, the warm up guy invited us to the after party, we were buzzing! We went back stage again with the ‘heads’ to give to their new owners.

While chatting to Chris Moyles, Tulisa, the film crew and guests we saw Leigh Francis and Gino appeared. We got talking to them, a real ‘pinch yourself’ moment but they were very cool and funny.

img_8359

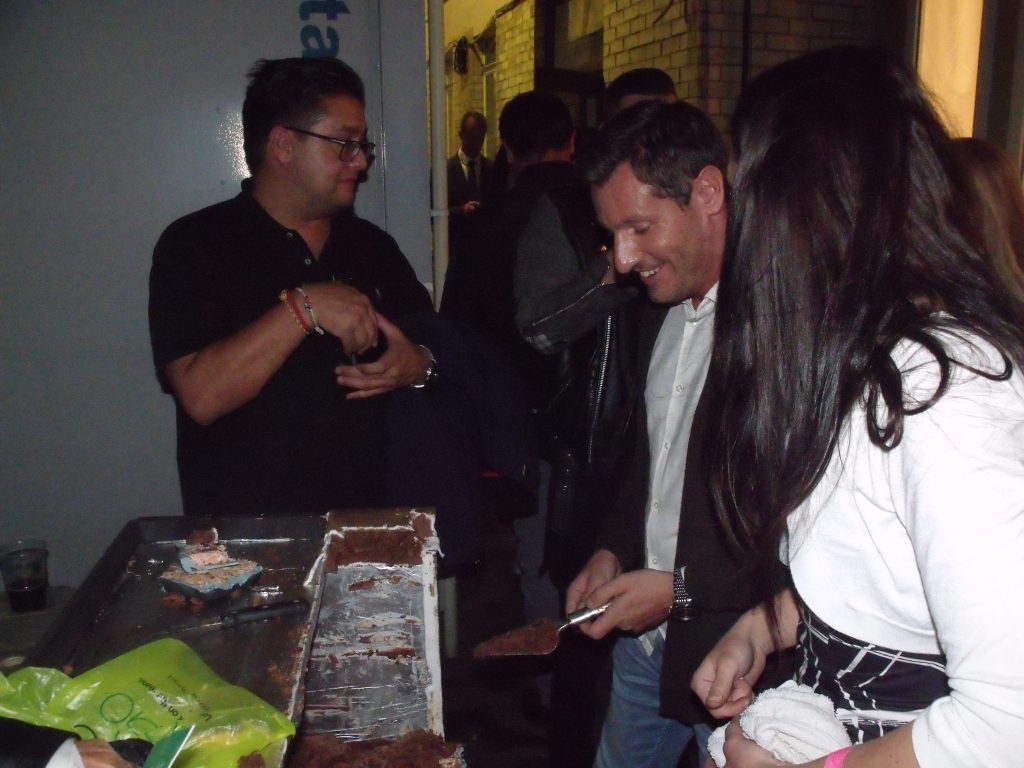
While chatting we remembered we still had quite a lot of cake left, so we ran into the studio and wheeled it outside for everyone. As we were talking to the guests, Dean Gaffney walked over and started digging in..

Celebrity Juice cake, delivery Part II img_8357

The rest of the night was filled with chats with as many people as we could. The reception of the cake and heads was awesome, and we were treated like celebs ourselves by the crew and guests.Celebrity Juice cake, delivery Part II

It really was an incredible evening and finally all the hard work was over and we could have a laugh.

Was all the work worth it?

Of course! And we would do it all again tomorrow if we could. Maybe a bit of sleep first.

As we thanked everyone and said ‘bye’ we looked around and realized we still had to load the car. Then drive two more hours to get home.

There is no rest for the wicked!


They say you should never meet your heroes but we are so glad we did and hope to party with them again soon!!!


Aggy, Andy and Zara


xxx
Finally the time has come that we can share with you our Western Lowland Gorilla cake for WWF exhibit.

dscf5228

We were asked to join a sugar artist collaboration with over 20 other cake artists from around the world. Of course we have agreed with a great pleasure to support WWF.

We have chosen to make The Western Lowland Gorilla mother with her baby for our piece as they are massively endangered.

img_3066

“Populations can be found in Cameroon, the Central African Republic, the Democratic Republic of Congo and Equatorial Guinea as well as in large areas in Gabon and the Republic of Congo. The gorilla’s numbers have declined by more than 60% over the last 20 to 25 years. Even if all of the threats to western lowland gorillas were removed, scientists calculate that the population would require some 75 years to recover.”

We shaped and sculpted some dummy for inside of Western Lowland Gorilla cake for WWF.

The reason we didn’t use cake for this piece is because it will be on display at NEC in Birmingham and needed it to last longer than a just normal sponge would do. The dummy cake will be placed along other pieces at the exhibit.

When we had the basic shape it was covered in white modelling chocolate. and started to add more detail to the mother gorilla. After the hands and face were done we started to texture the fur using one of our home made tools. After the fur was finished it was time to hand paint which consisted of plenty of layers to cover the white chocolate.

dscf5211

The last thing was to sculpt the baby and give their faces a realistic look.

Western Lowland Gorilla cake for WWF

Lucky the day we finished the weather was so nice it was perfect for an outside photo shoot so we could try and make it look more natural in the garden. Find out more and see all the other amazing pieces of the other artists in the video below.

I hope you like our contribution and hope to see you at Cake International in few weeks’ time.


Aggy, Andy & Zara,


xxx
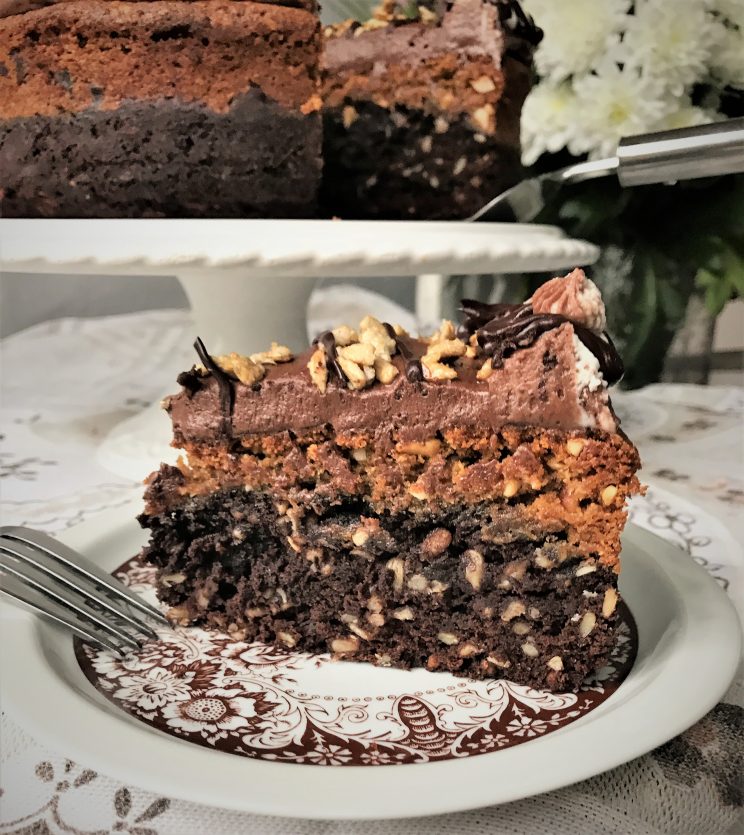
Lemon, almond and poppy seeds roulade

Lemon almond and poppy seed roulade recipe

So who watched the ‘Great British Bake Off’ last week? I think we will be trying our hands at the show stopper as it looked amazing!

Lemon almond and poppy seed roulade Here at Cotswolds Finest Cakes HQ not only do we have a passion for outstanding sculpted, gravity defying and wedding cakes; we also love baking breads, preparing desserts making the ultimate sweet treats. In our new blog we would like to share our favorite recipes with you all so you too can make and bake the most delicious desserts for you and you friends and family.Lemon almond and poppy seed roulade and our litte modelAll the recipes will be varying in skill level but with good planning and attention to detail there should be no recipe that is too difficult for the home baker!

Lemon almond and poppy seed roulade recipe

All the ingredients we use are things that are either found at home already or are easily available from your local store.

So, get your aprons on, the oven fired up, zero the scales and let’s get baking.

First recipe we would like you to try is our amazing Lemon, almond and poppy seed roulade with delicious cream cheese filling. This really is a very moreish dessert which all the family can get involved in making and certainly enjoy eating! The only down side to this dessert is that it’s so easy to make and so delicious – you may find yourself making it over and over again!

(more…)

error

Enjoy my blog? Please spread the word and share the hapiness...

Suscribe
Instagram
YouTube
YouTube
Pinterest
Pinterest
fb-share-icon
RSS
LinkedIn
LinkedIn
Share