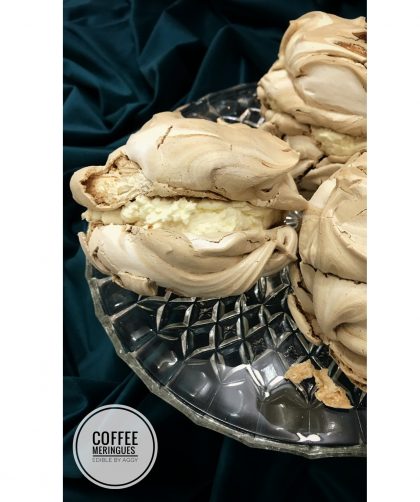
This week is National Coffee Week so whats better to celebrate it with than a Coffee meringues.
Fresh, moist, crunchy and chewy and full of whipped cream.
Coffee Meringues, a trip down memory lane…
My childhood memories give me a lot of inspiration for my cooking and baking today. Watching Celebrity Bake Off a few weeks ago reminded me about one of my favourite Coffee Meringues. A special simple desert from the best bakery in town where I was born.
Every time I went there the choice was pretty difficult. No only the well known classics to choose from but now and again a special new treat was popping in. In almost all cases my first choice were Coffee Meringues.
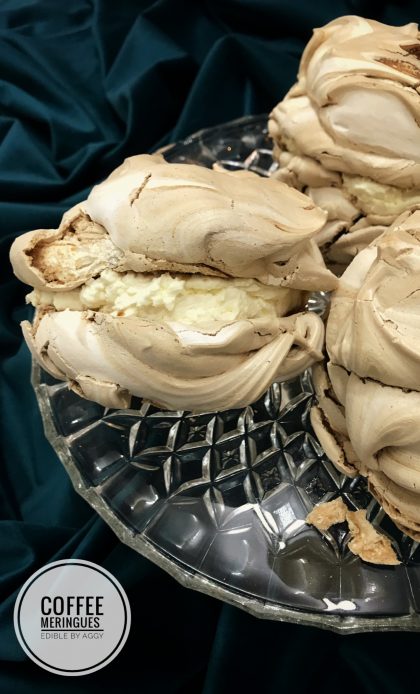
Pretty. Flawless. Always fresh and full of whipped cream.
We were allowed to eat Coffee Meringues because it was made with Inka. We have this special wheat coffee in Poland. It is extremely tasty and contains absolutely no caffeine. When I was younger Inka was served with breakfast or with supper. It was very popular and probably even more consumed than hot chocolate at that time. Usually made with only milk or half and half with water.
Therefore it was totally safe for us or any kids to have Coffee Meringues.
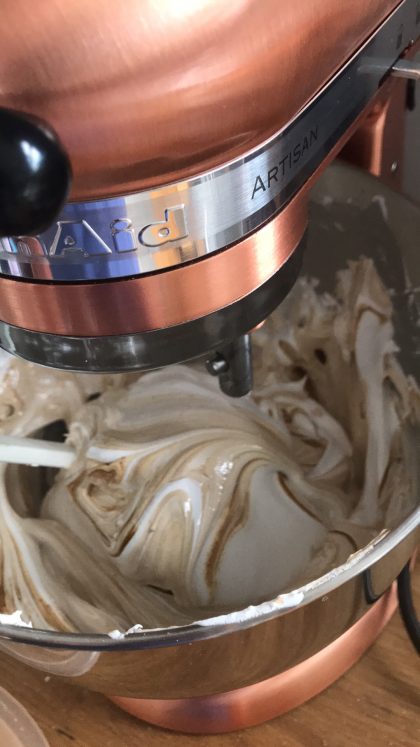
Today I am recreating my childhood taste with some Inka that I have left over from my latest trip to Poland. When making Coffee Meringues you can use ordinary instant coffee or any other alternative as it only contains tiny amount.
Tasty clouds of happiness.
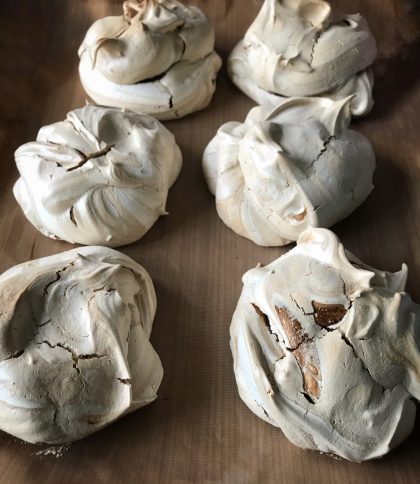
CoffeeMeringues are very easy to make. They don’t require any special skills or equipment. You can eat them straight away or leave to soften for a few days.
Giant, delicate, light, crunchy and gooey Coffee Meringues are sandwiched with delicious whipped cream. When fresh the crunchy shell brakes as you bite it and it’s soft centre amazingly complimented by the cream.
Crunchy and simple biscuits that look like beautiful pastry Princess plaits.
What are Princess plaits and where did they come from?
Originally this was my grans recipe and she called it Kindling. I guess because Kindling, now Princess plaits were crisp, snappy and very light. They were eaten at the end of carnival season just before lent and Ash Wednesday.
The Polish tradition of Kindling slightly faded in our house. Mainly because we do a lot of baking so keeping up with additional sweets proves too many cakes. Also because Zara loves helping so we make these as an afternoon treat, when she wants to make something different.
Why should you make it?
Princess plaits are the tastiest way of using left over egg yolks after making Coffee meringues (recipe coming up soon) which you also must try!!
Besides Princess plaits are perfect for kids motor skills and believe me the small hands become faster with each plait! Check the video below. Zara is a master at it now.
I’ve slightly improved and speed up the way of doing Princess plaits in my recipe. It use to take so much longer hence Princess plaits have been made only at special occasions. Making this now quite efficient, pain free and speedy process so Princess plaits were just perfect name for it.
Unlike any other biscuit.
The biscuits are quite light and soft but you need to try it yourself to understand the texture. It’s this kind of consistency between crunch and crumble that I cant really find a word to describe.
Freshly cooked they are delicate, puffy and delicious. Left aside to cool they become crunchy and snappy unlike any other pastry I have ever tried.
Princess plaits biscuits when fresh are perfect on its own or lightly sugar dusted. They can be sprinkled with cinnamon sugar or dipped in a chocolate sauce.
Method.
Put all the ingredients in a mixer bowl:
450g plain flour, sieved
5 large, organic egg yolks
1 or 2 spoons of your strongest alcohol (rum, brandy or vodka type)
200g natural yogurt
You can try making Princess plaits by hand but much quicker and easier will be using a mixer as it requires good beating. Mix using the beater end, the idea behind it is to incorporate as many air pockets as possible.
Start mixing it on a slow speed slowly increasing. Eventually turn it on on maximum and watch the mixer as it might turn a little bit violent. Continue mixing the dough on high speed for at least 15 minutes.
Place aside to relax wrapped in cling film or a sandwich bag for at least half an hour.
Put the Princess plaits dough back in the mixer and continue to beat it on high speed for additional 15 minutes. Wrap again and put in the fridge for another half an hour.
Fun part!
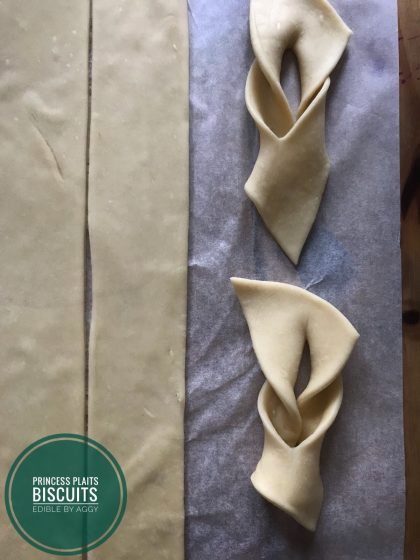
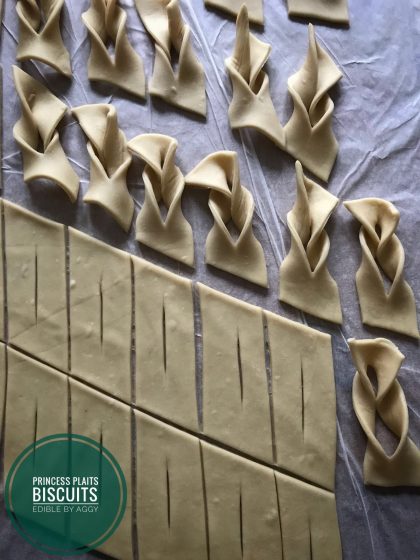
When ready, roll very thinly approximately 1.5 to 2 mm. Use pizza cutter to cut 1.5″ wide strips then make diagonal cuts about 3″ apart to create the individual pieces. Then cut each piece carefully through the middle leaving about 3/4″ uncut space at each end.
Gently twist one end through the middle cut to create Princess plaits look alike. Once again please check my video above when Zara is making it very easy.
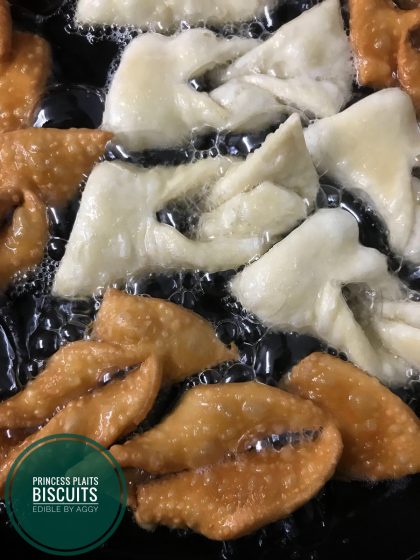
Warm up in a pan
2 cups of oil suitable for frying (rapeseed or coconut are best)
and fry on medium heat for a few minutes each side until golden. At this stage please keep little people away from the pan. It can get very hot and it might make the process difficult. They cook very quickly and no one would enjoy a burn Princess plaits biscuit.
You can eat it immediately or save (if there are any left) for later.
Princess plaits when still warm go best with a little sprinkle of icing sugar but you can enjoy it with anything you like.
I hope you will like Princess Plaits biscuits as much as we do!
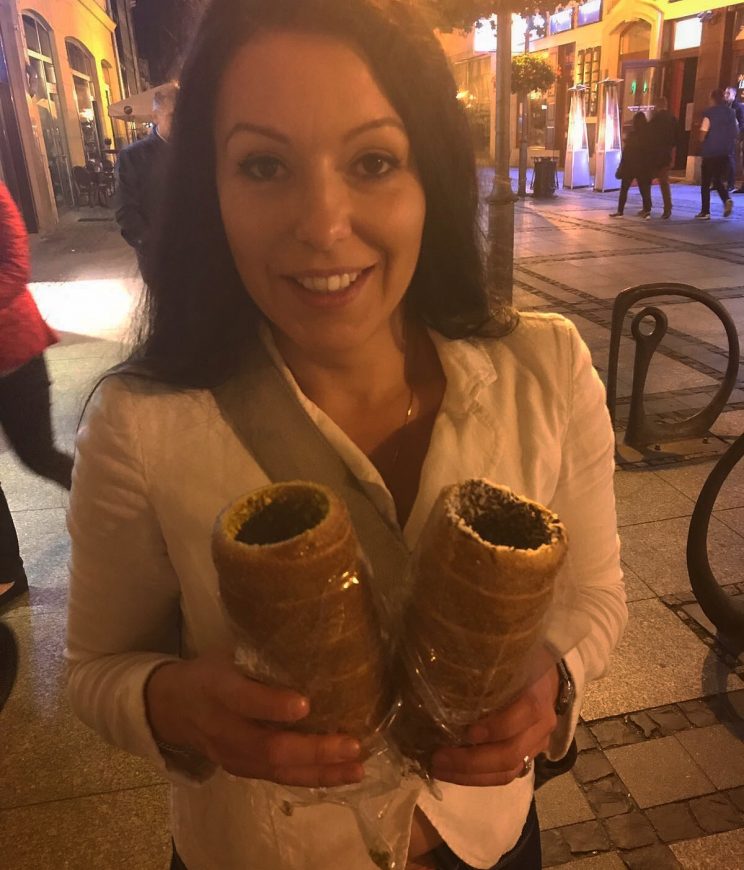
Strap yourself in, today we have an interesting one, Chimney cakes.
Chimney cakes are like a perfect marriage between churros and a warm fluffy doughnut. Ideally with a little scatter of cinnamon sugar. Filled or empty, with or without nuts and sprinkles, literally you can eat it how you please.
We tried making the Chimney cakes for the first time ever a couple of days ago. We really liked the outcome and the idea so decided to share the recipe with you.
How did we come up with Chimney cakes you might ask?
Recently we went for a road trip around Europe. We were lucky to visit some beautiful and interesting places and a few with a nostalgic warmth.
One of the places we visited was Wrocław* in Poland (*read Vrotswav).
When I was younger I spent several years living and studying there. And as I haven’t been back there for a 10 or so years I decided to stop for a few days.
While walking and admiring old haunts our attention straight away was caught by every single cake shop. In some of them we even had double helpings or bought something to take away to munch later. This time while walking through Old Town and Market Square we could smell an interesting sweet mixture and got intrigued.
A little hidden away shop front with a massive queue outside so decided to have a nose around. This later happen to be a Chimney cakes shop which was one of our favourite treats on this trip. There were so tasty we needed to recreate them as soon as possible. There was no way we could wait any longer to have another bite.
Originated from Transylvania.
Chimney cakes originally came from Hungarian-speaking part of Transylvania, Romania. They are also known within the culinary heritages of other European countries like Hungary, the Czech Republic and Austria.
Chimney cakes are made from rolled sweet yeast dough. The dough traditionally is wrapped around a special wooden rolling pins and baked constantly turn over a grill. Chimney cakes are then topped with sugar and all sorts of things.
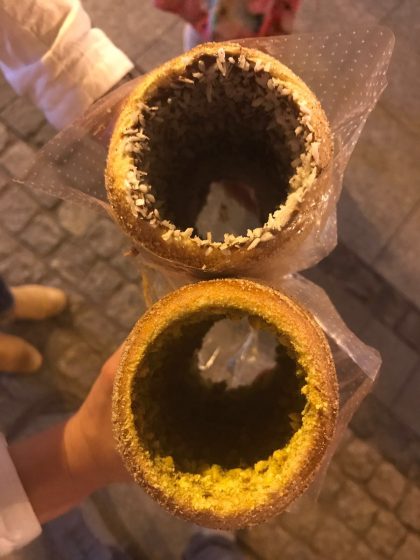
The name comes from the effect that Chimney cakes create when taken off the baking pins after baking. When they are very hot they steam from the middle, soft part of the bake that looks like a smoking chimney.
But don’t worry I have managed to adapt it for everyone to try it at home without a fancy ovens and wooden pins.
Why should you make it?
I shouldn’t really have to convince you to make Chimney cakes as they are simply amazing. Maybe a little bit time consuming as all yeast dough bakes but otherwise I would eat it warm every day.
Chimney cakes taste divine. Soft, fluffy and not too sweet. You can eat the Chimney cakes creamed inside with almost anything you can come up with. From some soft fudge, chocolate or caramel, jam or marmalade, fresh cream or even topped with ice cream. Often paired with crushed peanuts, pistachios or almonds.
Method.
This recipe will make approximately 12 chimneys.
To make Chimney cakes you will need:
520g plain flour
25g fresh yeast*
90g icing or confectionery sugar
200ml warm milk
If you are using fresh yeast make a starter as directed here fresh yeast starter.
*If you are using dry yeast you can convert it here.
For the next step I use my mixer with paddle attachment. You can also work it by hand but the dough will be slightly wet and quite sticky so I prefer to avoid all the mess.
When your starter is ready place it with the remaining ingredients in a mixer bowl.
Add:
2 large organic eggs
1tsp vanilla
pinch of salt
80g melted but cooled unsalted butter
Mix it on a medium to high speed for a few minutes until it becomes stretchy and smooth. Move the dough to a lightly greased bowl and cover with a cloth. Let it rest for one to two hours until at least double in size.
Homemade Chimney cakes baking pins.
In the meantime prepare some Chimney cakes pins. As mentioned earlier Chimney cakes are originally baked on wooden rolling pins that are spinning over a grill or fire. We haven’t got the luxury of the special equipment so I came up with those simple cheat baking pins.
You will be able to use them over and over again if you are careful enough. Don’t worry to much if they get damaged as they are cheap and quick enough to make some fresh each time.
What you will need:
baking paper
tin foil
a few empty kitchen paper towels rolls, ideally 6 – 12 tubes
Roll each tube in tin foil and push the ends inside the tube. Follow this step for each tube and then follow the same with baking paper.
Turn on the oven to 200C, 180C fan.
Shaping the dough.
Take the dough for Chimney cakes out and slightly work it again. It will be quite sticky but you can use some plain flower to sprinkle for easie rolling.
Roll the dough quite thin, approximately 1/4″(1cm) and neat rectangular shape around 15″(45cm) long by 12″ (30cm) wide. The tidier the rolling, the easier the next step will be.
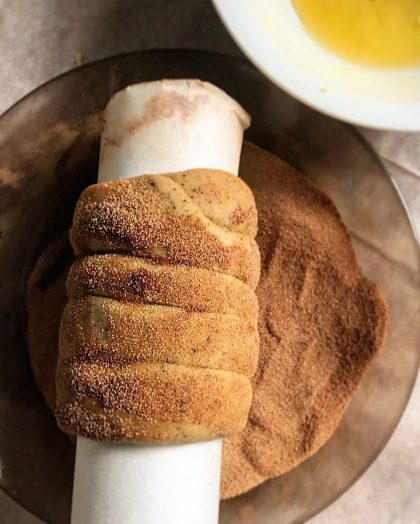
Cut it with a pizza cutter to straight, 1″ (2.5cm) wide strips. You should end up with 12 strips. Roll each strip on the mock up baking pins and tuck the ends under the dough.
When you wrap it around the tubes it might have some gaps but that’s ok. Roll it a few times like you would roll a rolling pin. TOP TIP. I push my tubes onto a rolling pin for easier rolling. Make sure there are no gaps in the dough after rolling. Then press and roll it in the cinnamon sugarmixture.
Put it in the oven standing up. I remove all the oven shelves and use my lid rack to keep the tubes in place. Bake for around 12 – 15 minutes or until golden brown but do not overbake. They need to be on a lighter spectrum from the inside.
Standing my Chimney cakes was easier and quicker to turn them around so they bake evenly. If you haven’t got anything to hold them securely you can also use a narrow baking tin ad hang them on long skewers.
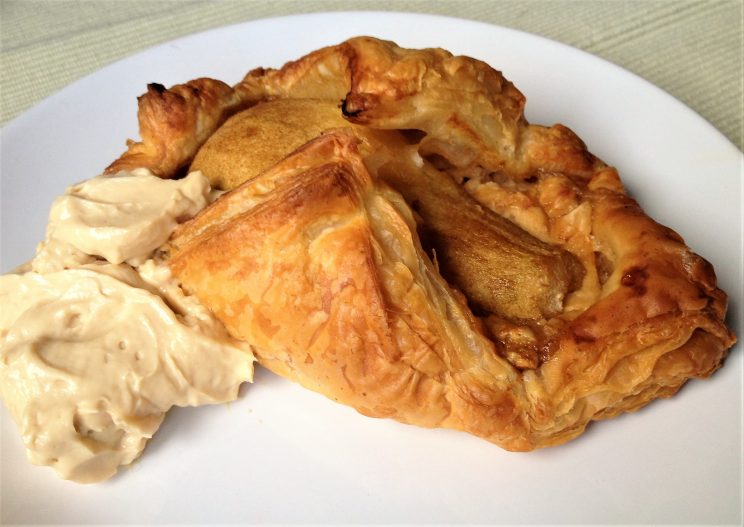
Pearfect turnover, lazy pear and cream cheese puff pastry wrap.
We have all been in the situation where you need to bake something quick and have no idea what to make. We were sat on the sofa having a rare lazy day when we had that freshly baked craving, but didn’t want anything to time consuming. Having this feeling I have thought of a solution the Pearfect turnover.
Looking through the kitchen I found ready made puff pastry and bag of pears so quickly created this tasty bake.
Pearfect turnover is ideal, whether it is…
… for a last minute dinner party and you need a quick desert.
… friends or family are coming over and you need something for afternoon tea.
… or it’s one of those lazy Sundays when it’s raining and nothing you can find tempts you. Only something freshly baked and hot from the oven will do.
So that’s how the Pearfect turnover was born.
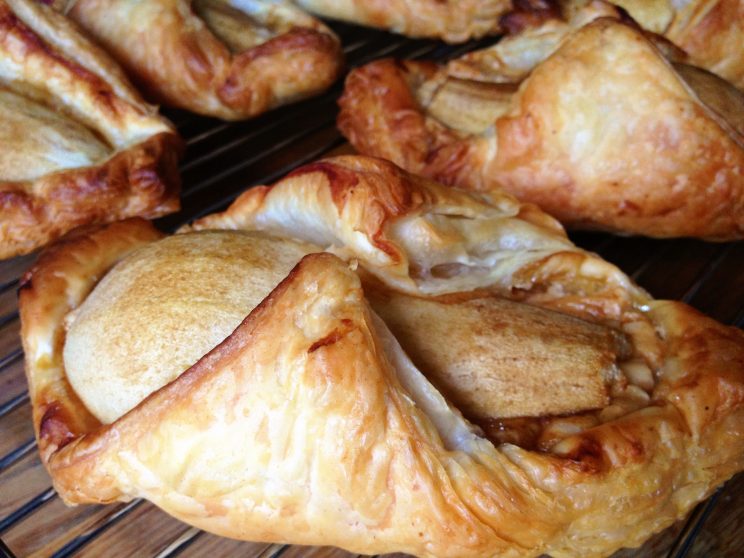
Pearfect turnover that I came up with is the simplest, tastiest sweet treat ideal for any occasion. When you bite into the Pearfect turnover immediately can taste the juicy pear with flaky puff pastry covered in cream cheese. It isn’t overly sweeet but natural and fresh pear flavour makes it perfectly balanced. The pear will become soft and juicy which will complement the crunch of the puff pastry.
Minimum effort, maximum taste.
This Pearfect turnover really is the minimum amount of effort with maximum taste. I think baking can be cheating sometimes. It doesn’t have to be hours of preparation or following complicated recipes. If that isn’t you try this simple recipe and you can see how much fun baking could be.
This is exactly what we made a beautiful juicy pear wrapped in puff pastry straight from the oven. Enjoyed with some fresh double cream, this really is as simple as baking can get.
Method
1 pack of ready rolled puff pastry
3 Pears
200g of soft cheese like Mascarpone or similar
3 tbsp. of dark soft brown sugar
some spare large grain sugar for the top, I have used Demerara
Pre heat the oven to temperature marked on your pack of pastry.*
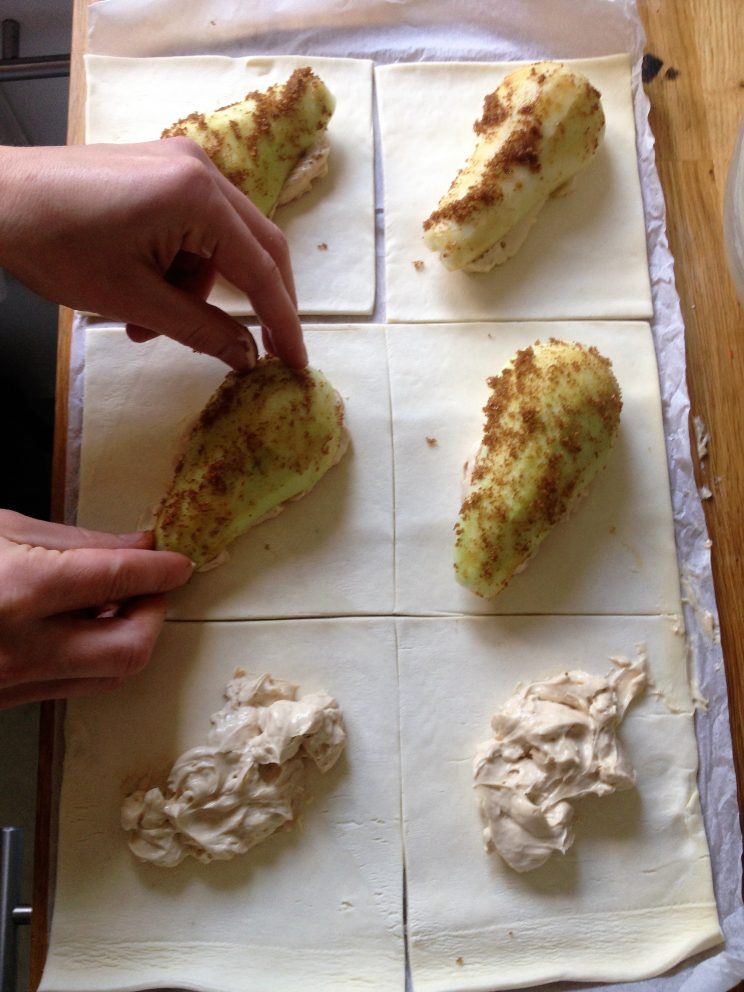
Put the soft cheese in a bowl, beat until smooth. Add in the soft brown sugar to taste and mix until combined.
Peel the pears and cut into half’s, remove the seeds. Unwrap and unroll the readymade pastry and cut into 6 equal squares.
Divide the cream cheese and put into the middle of each square of the pastry. Gently press the pear half diagonally on the pastry, sprinkle with brown sugar.
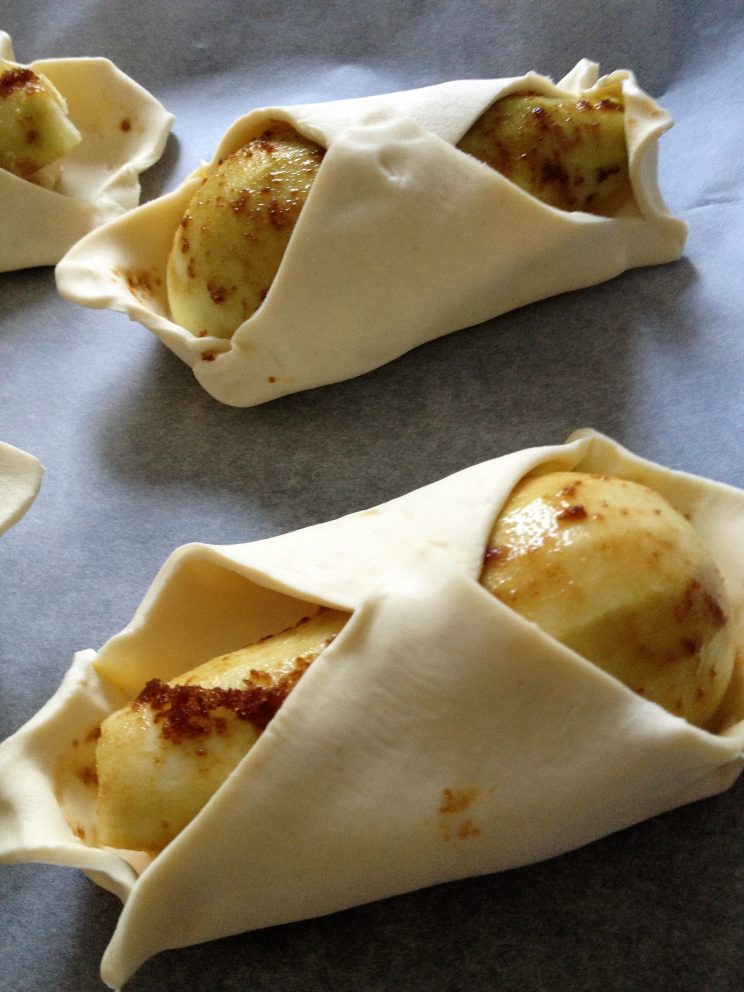
Fold up the corners and pinch at each end to make a boat shape. Fold the corners across the pear, gently press to stick together like so:
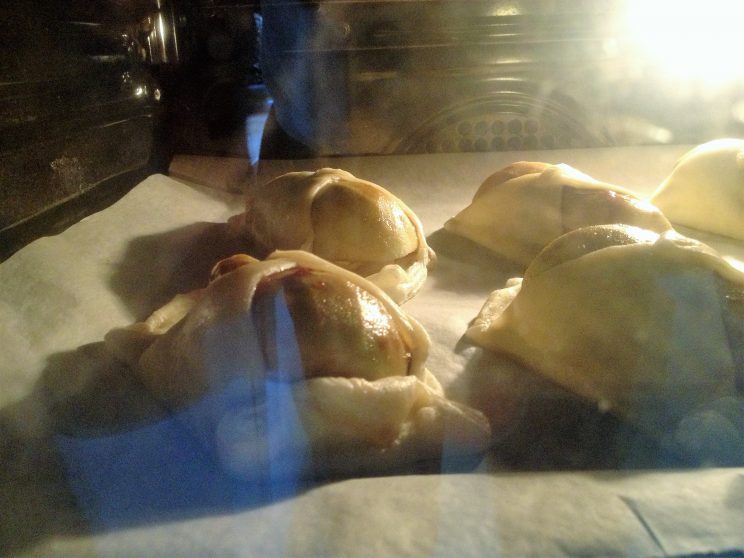
Place in the oven and bake as directed on the pack or until golden brown.*
When baked remove and place on a cooling rack You can eat it hot straight from the oven with some fresh cream or leave to cool and enjoy later. They keep very well and you can even freeze them for another day (if there is any leftover).
The sweetness from the cream cheese and baked pear go perfectly and the flakey puff pastry really makes this a tasty treat for any occasion.
If you have no pears you can swap them for apples, peaches, plums or any other ‘firm’ fruit.
Keep an eye out for more quick and tasty treats to enjoy.
*I haven’t been specific with temperature and baking time as the pastry will vary slightly from brand to brand.
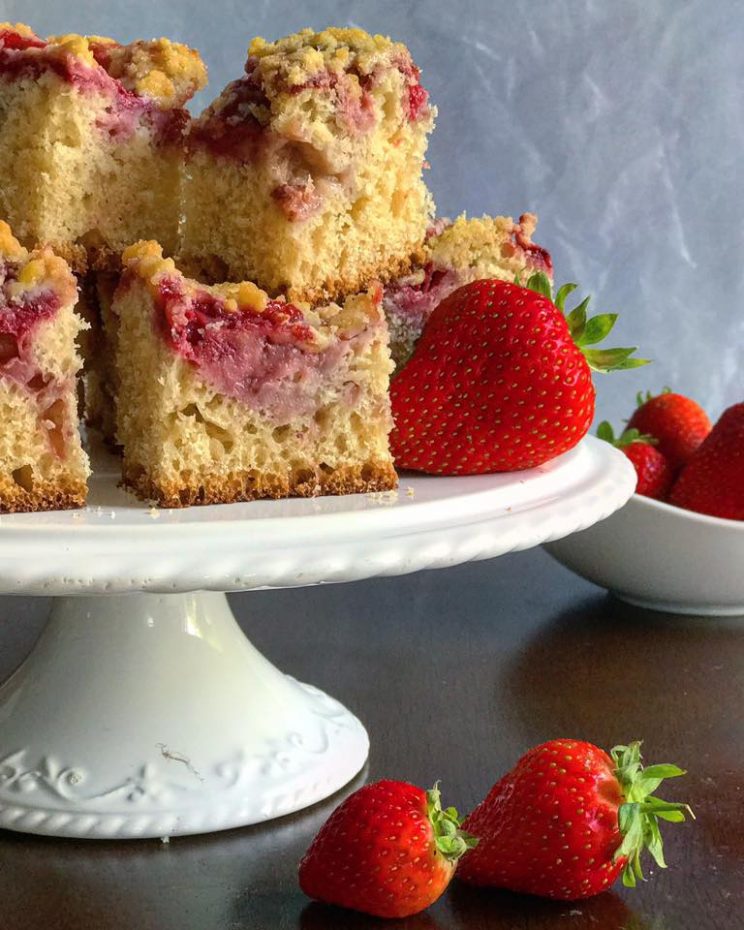
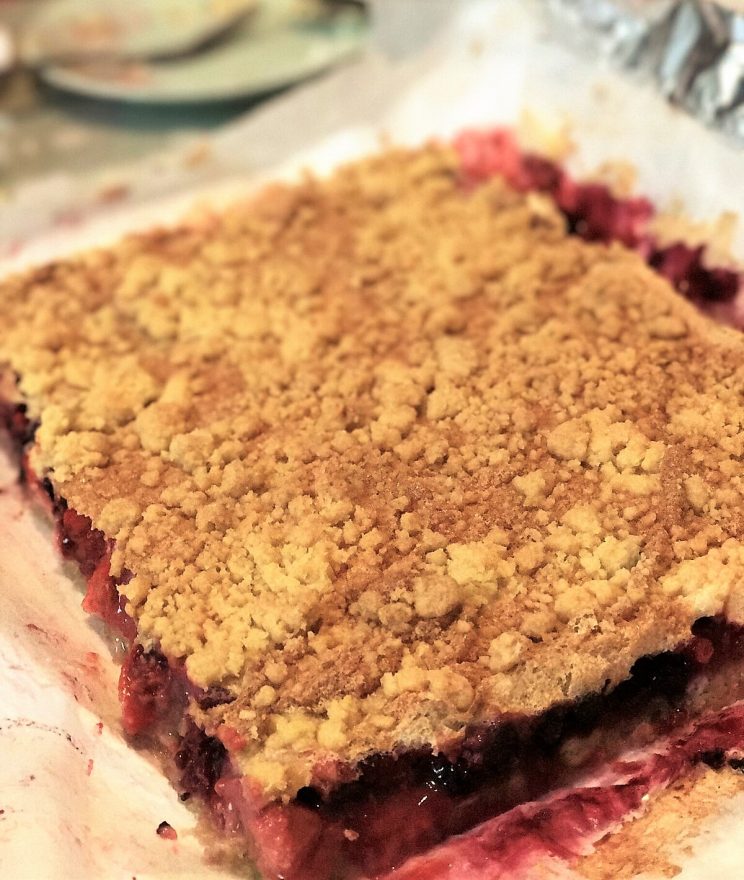
Today we have a special bake Babcias strawberry crumble cake*.
What an amazing hot summer we are having in the UK right now!! First time in years I am actually able to slow down for a little while and admire the surroundings. I have finally managed to expand my beautiful organic allotment and we have picked our first large crop from the strawberry patch. As soon I have picked the first strawberry I knew what I am going to make. My thoughts took me to my late grandma and her amazing Babcias strawberry crumble cake!
My grandma, in polish babcia* who of course had a massive influence on my food journey was an amazing cook. She was always cooking or baking and was always offering food to anyone who walked through the door. Her and granddad (dziadek*) had a massive fruit and vegetable garden where they were growing many organic fruits. She was the master queen of yeast dough and in the summer her signature bake was this simple berry cake. Preferably topped with strawberries or raspberries and it had to be sprinkled with some delicious crumble.
This tasty and delicious Babcias strawberry crumble cake is a must in the current weather. You can have it as light breakfast with a glass of milk or a quick bite with afternoon ice tea. It’s great for a picnic or lunch out as it keeps really well and could be a healthier alternative to a doughnut.
Don’t worry there is no kneading or hard work involved as you normally would expect when working with yeast. The hardest part is watching and waiting for the dough to grow but believe me it’s so worth it!
Babcias strawberry crumble cake can be eaten hot, almost straight from the oven or even cold the next day… but it never lasts that long.
Babcias strawberry crumble cake is flavoursome, light and fluffy almost like the Italian Panettone cake. With fresh, juicy sweet and sour burst of strawberries nicely ‘melting’ in the dough. Coated in sweet, golden, buttery crumble!
Method:
The dough part for Babcias strawberry crumble cake.
You can mix with a large wooden spoon until well combined, approximately 10 – 15 minutes. Alternatively to save time and energy I am using my free standing mixer with beater end. Leave in warm place covered with a cloth till at last double in size. Approximately 45 minutes to an hour. I don’t usually rush this step so sometimes let it stand even slightly longer when I go out or carry with other jobs.
When the Babcias strawberry crumble cake mixture is growing I prepare the strawberries. You will need
800 – 1000 g of strawberries (or if you prefer other red berries)
Wash them, clean and dry thoroughly. If they are a little bit on the sharp side, mix it with a few table spoon of sugar and leave on a sieve to let the juice out.
Crumble part for Babcias strawberry crumble cake.
160g sieved plain flour
110g cold (from the fridge) and chopped unsalted butter
100g sugar
Chop all the ingredients together to crumble like mix and place it in the fridge.
Assembling Babcias strawberry crumble cake.
You will need 10 or 12″ square tin or a equivalent lined with baking paper. After an hour or so of resting the yeast dough mix it briefly again and spread it in a tin. Evenly cover with fruit and levse for another 15 – 30 minutes to rest.
Warm up over to 190C. Sprinkle crumble all over the Babcias strawberry crumble cake and place it in the over for around 45 minutes. Bake to golden on top or check it with a skewer.
Remove from the oven and slice it straight away or leave it to cool.
I hope you will enjoy it as much as we do and will bake it over and over again.
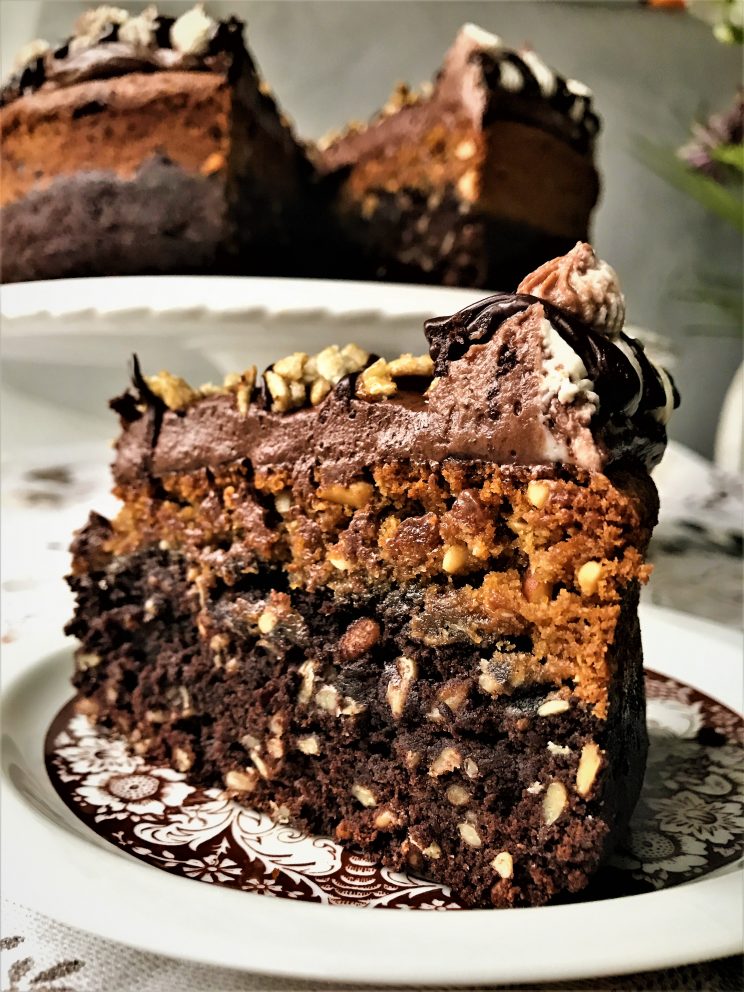
I am quite fussy when it comes to food and I don’t like walnuts in brownies but fancied creating the texture they give. One day I really wanted a sweet, nutty treat and I have decided to replace the walnuts with sunflower seeds.
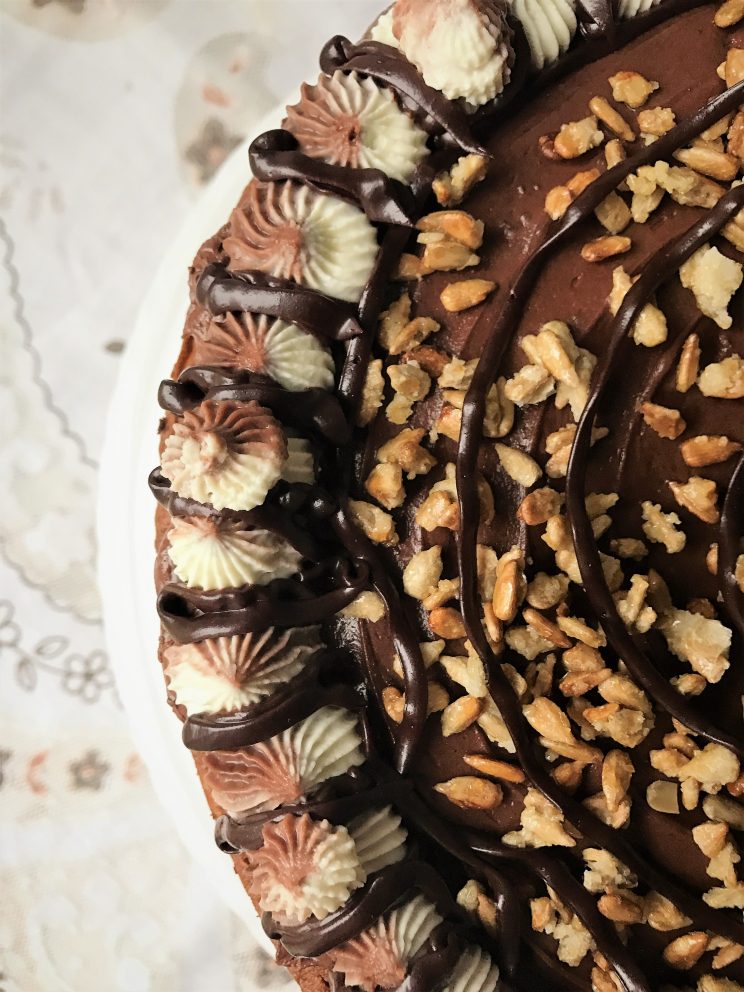
When sitting and testing for the first time I had another genius moment and just spotted peanut and almond brownie laying around. Put the two together with a little bit of cream and that is how Nutty sunshine torte was made.
Nutty sunshine torte is very easy bake and you can make it in only one bowl with a couple of utensils.
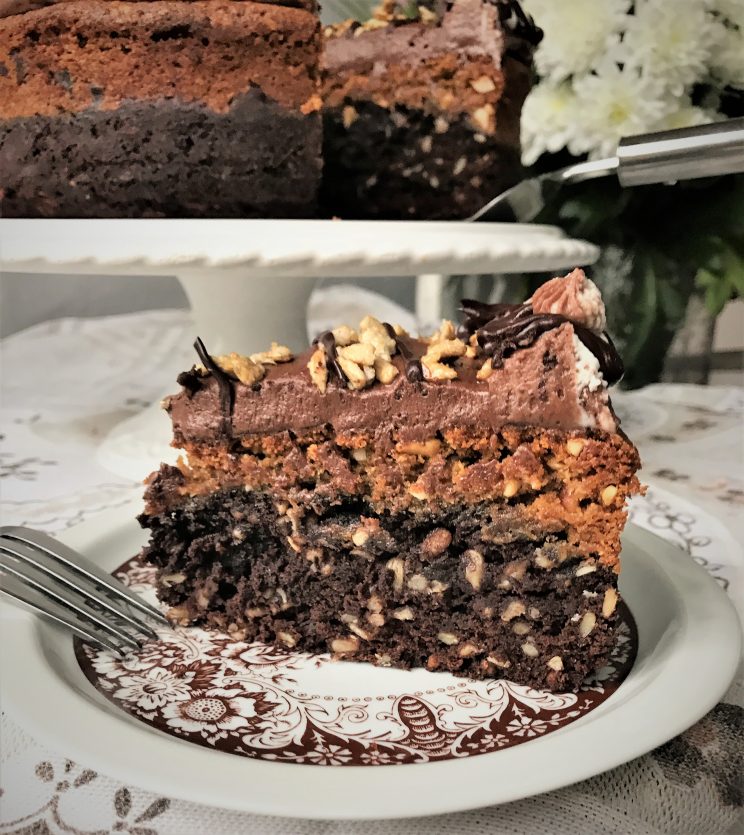
It taste a little bit like cake version of Snickers bar. Chocolatey yet crunchy, full of chewy peanuts, slightly salty, topped with delicious fluffy cream.
Nutty sunshine torte a perfect afternoon tea treat or birthday cake all depending on your creativity and imagination when decorating.
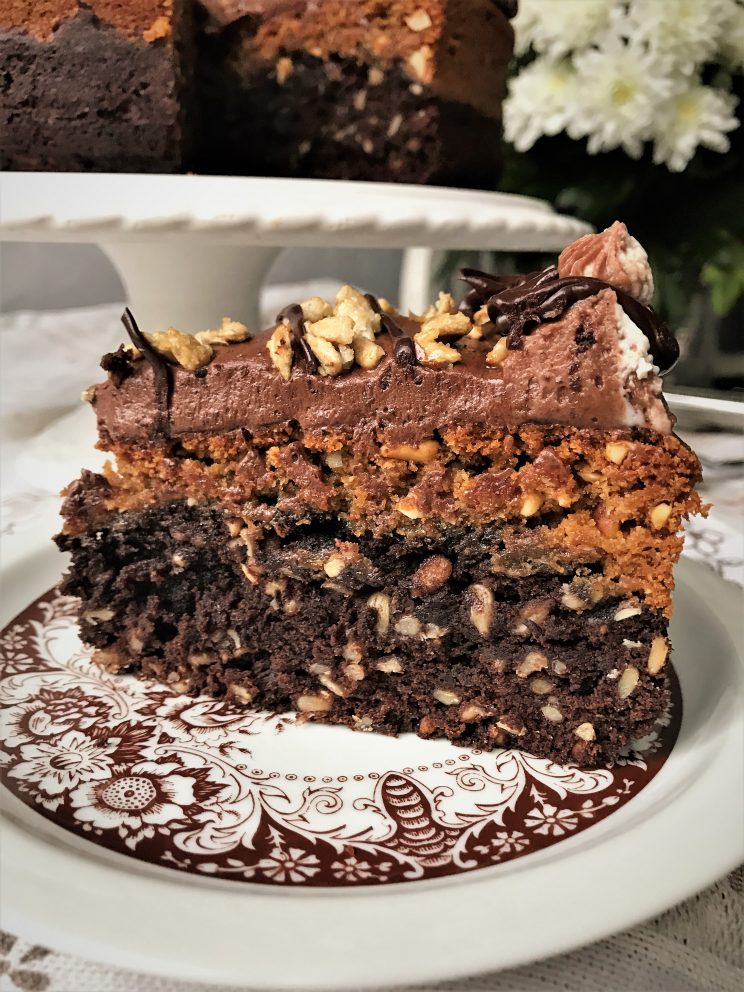
Nutty sunshine torte is an easy, simple perfect brownie Snickers cake.
The recipe
For the first layer you will need:
210g white sugar
160g soft brown sugar
85g cocoa powder
150g plain flower
1/2 tsp baking powder
1/4 tsp rock salt
180g sunflower seeds
4 organic eggs*
225g melted unsalted butter
dash vanilla
*TOP TIP. If you are baking with your kids let them crack the eggs. The easiest way is to open them over a sieve in case any shells breaking in. Then simply whisk it through.
Heat the oven to 175C or 155C fan.
Sieve all the dry ingredients in to a large bowl. Add the rest and mix it with a whisk or a wooden spoon until well combined.
Line 9″ spring form with baking paper and put the mixture in the tin.
Place it in the oven and bake the first layer for 30 minutes. In the meantime prepare the peanut layer.
For peanut layer
use the same bowl and utensils and mix through after adding each ingredient:
120g crunchy peanut butter
40g of peeled and roughly chopped monkey nuts
70g melted unsalted butter
130g white sugar
100g soft brown sugar
2 organic eggs
dash of vanilla
110g ground almonds
1 tsp baking powder
1/4 tsp of rock salt
After baking the first layer for 30 min take it out the oven carefully. Try to complete the next step quickly.
Very gently top the the peanut butter mix on to brownie layer. Bake for additional 30-40 minutes at the same temperature until golden brown. Leave to cool.
The cream
90g unsalted butter
45g cocoa powder
2 tbsp golden syrup
dash vanilla
250g icing sugar
2 to 4 tbsp milk
Put all in a mixer and slowly work to a paste then beat on high speed for a few minutes to light and fluffy.
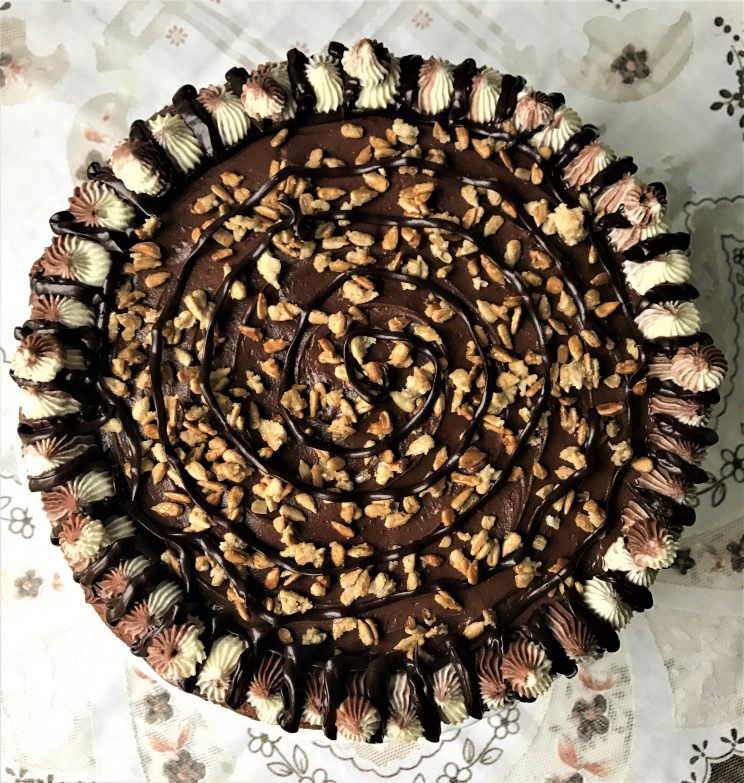
Spread on the cake and decorate as you wish.
I decorated mine with some toasted in sugar sunflower seeds, mascarpone and some dark chocolate sauce.
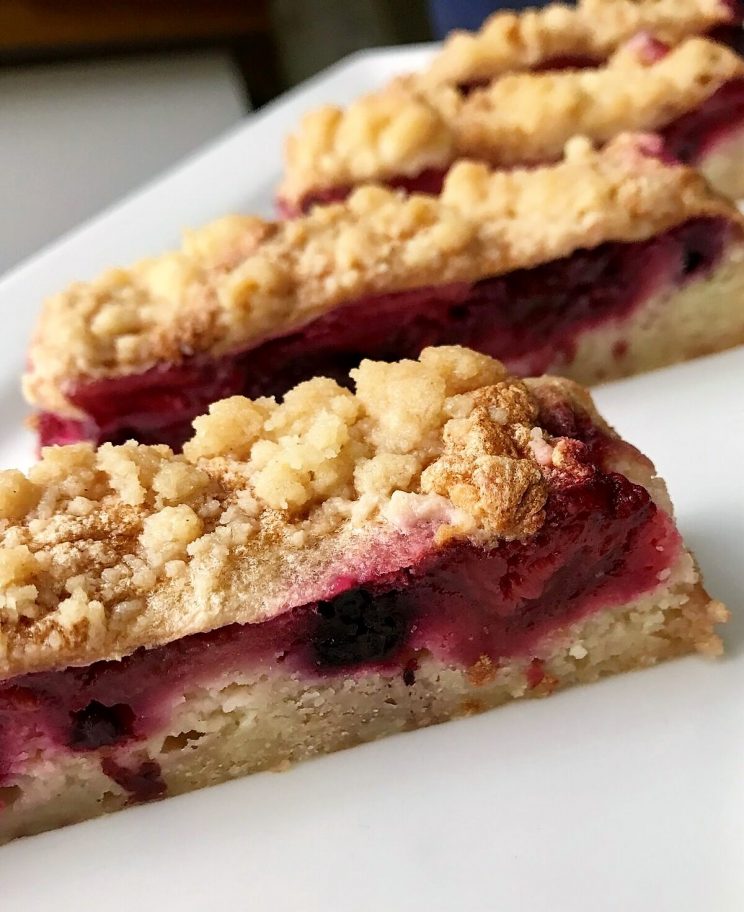
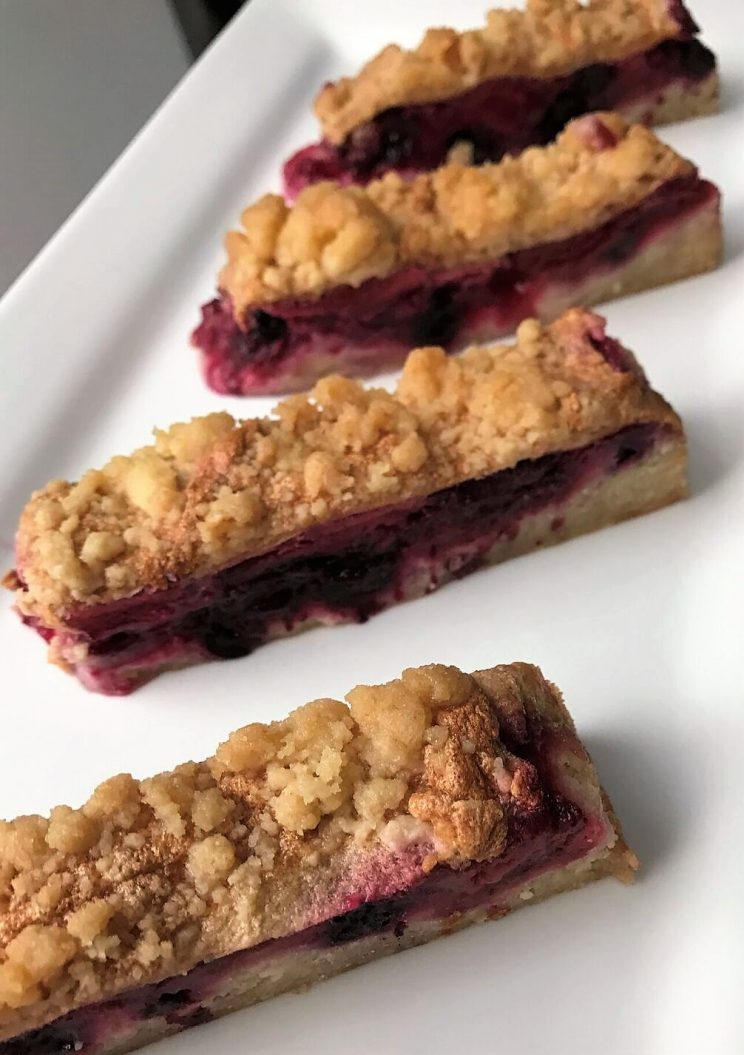
Last summer we spend an amazing few weeks in Poland. The weather was outstanding, almost every day over 30C and the gorgeous weather meant there was plenty of juicy and delicious fruits to be picked.
Originally Very berry cookie dough cake was my mums recipe that she made over and over again for us when we visited. She made it with apples and cherries but we adapted it slightly and came up with this Very berry cookie dough cake version.
The Very berry cookie dough cake is a fresh, quick and easy reminder of those long hot summery days. It taste perfect when eaten warm with ice cream or cold even on its own!
The base.
For the Very berry cookie dough cake base you will need:
400g plain flour
4 organic egg yolks
200g sugar
250g cold, unsalted butter
dash of vanilla
2 tsp baking powder
Sieve the flour. Chop the butter in to small cubes and place all the of the ingredients in a food processor. If you haven’t got a food processor you can ‘rub’ it with your fingers. It suppose to make a loose crumble like texture. Put a side.
Meringue.
In the meantime prepare:
4 egg whites
pinch of salt
100g brown sugar
Whisk the egg whites with salt until stiff. Slowly add sugar and set aside.
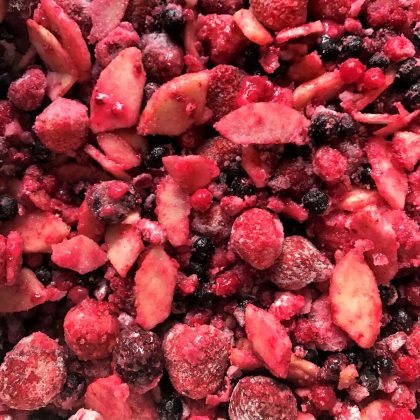
Fruit mix.
You will need :
1200g – 1500g fresh or frozen mix berries*
4-5 tbls of corn flour depending on type of fruit you use
couple of spoons of sugar to your taste*
*I have used frozen mix of summer berries (red currants, black currants, strawberries and raspberries) with some extra frozen strawberries which allowed me to skip the sugar. We prefer our fruit to be slightly sour in taste especially when the cake and meringue are quite sweet. I have also added two crunchy apples, chopped to small pieces for the texture but again you can leave it out.
Mix the fruit with corn flour (and sugar) so it is coated evenly.
Warm the oven to 180C or 160C fan.
TOP TIP. First line a 10″ baking tin with tin foil making sure it overhangs the tin (this is to help to remove the cake later). Then using one, large piece of baking paper place it on top and press it into the corners again making sure it overhangs slightly.
Assembling the layers for Very berry cookie dough cake.
Depending if you are using fresh or frozen fruit please follow step 1 or step 2!
Fresh fruitbaking.
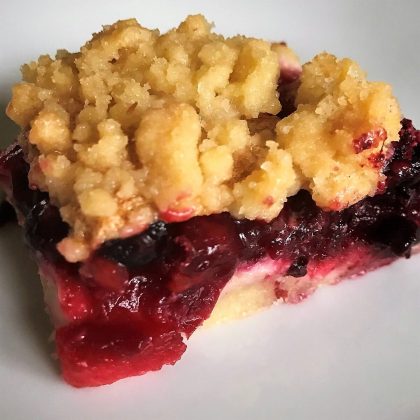
Sprinkle evenly 3/4 of the crumble mix in the baking tin. Gently cover with the fruit and then spread the meringue. Crumble the remaining mix on the top.
Bake for 45-50 minutes till golden brown.
Frozen fruitbaking.
Sprinkle evenly 3/4 of the crumble mix in the baking tin. Gently cover with the fruit and place it in the oven. Bake it for 25 minutes. Take it out and quickly top it up with the meringue and crumble the remaining mix on the top.
Bake it for 50-60 minutes till golden brown.
You can enjoy a slice or two straight from the oven but cool completely before removing from the tin.
So who watched the ‘Great British Bake Off’ last week? I think we will be trying our hands at the show stopper as it looked amazing!
Here at Cotswolds Finest Cakes HQ not only do we have a passion for outstanding sculpted, gravity defying and wedding cakes; we also love baking breads, preparing desserts making the ultimate sweet treats. In our new blog we would like to share our favorite recipes with you all so you too can make and bake the most delicious desserts for you and you friends and family.All the recipes will be varying in skill level but with good planning and attention to detail there should be no recipe that is too difficult for the home baker!
All the ingredients we use are things that are either found at home already or are easily available from your local store.
So, get your aprons on, the oven fired up, zero the scales and let’s get baking.
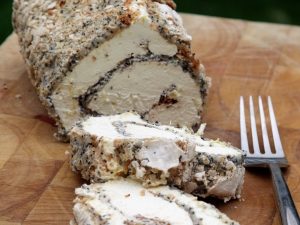
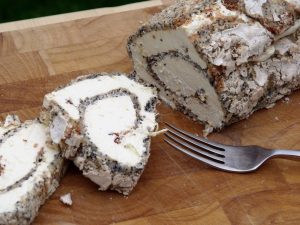
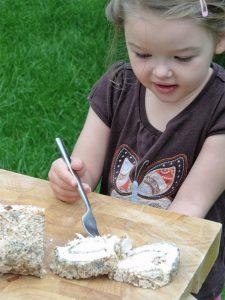
First recipe we would like you to try is our amazing Lemon, almond and poppy seed roulade with delicious cream cheese filling. This really is a very moreish dessert which all the family can get involved in making and certainly enjoy eating! The only down side to this dessert is that it’s so easy to make and so delicious – you may find yourself making it over and over again!


 Here at
 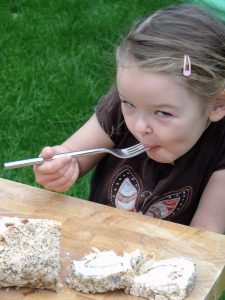 All the recipes will be varying in skill level but with good planning and attention to detail there should be no recipe that is too difficult for the home baker!